And finally, here we are with the third and last episode of the series, which I think will be the most exciting to read for most of you.
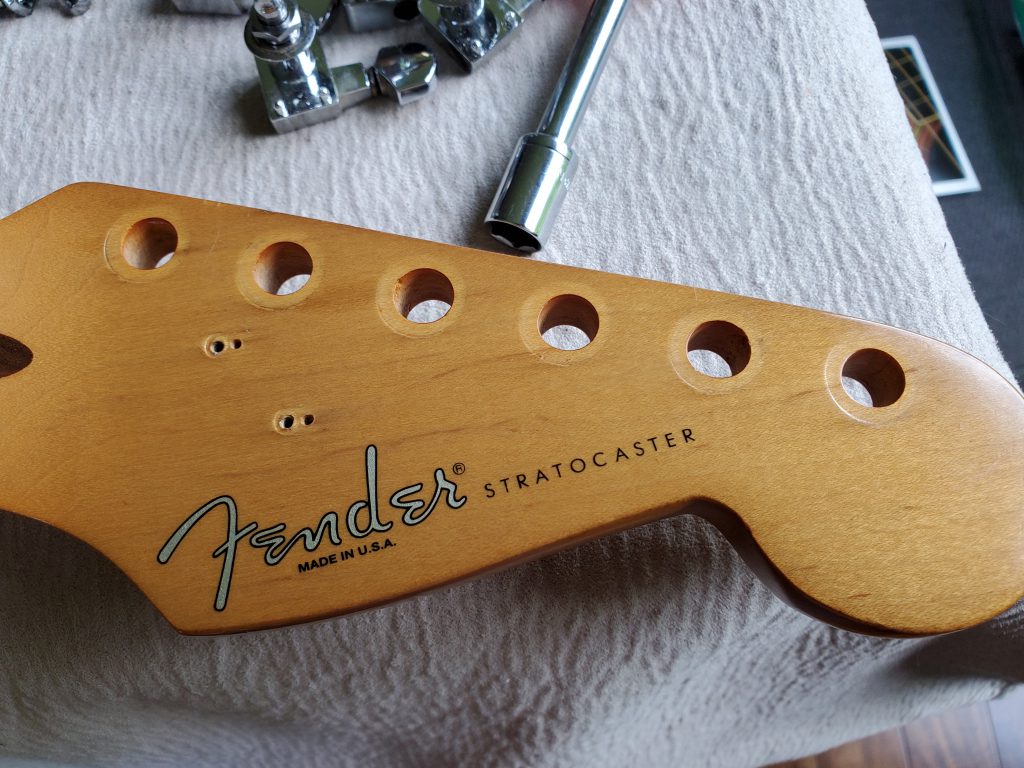
When I received my very first electric guitar 15 years later, it wasn’t in a playable condition. So I began with “what is a must fix for it to be playable again?” I already knew from the photos that my cousin sent me that I needed a set of tremolo springs, and a new set of strings. That was the bare minimum required at first sight. I also noticed most of the screws on the pickguard and pickups were rusty, as well as the tiny bridge saddles’ adjustment screws. The pickguard was pretty old and full of scratches but all of that is secondary, and I noticed how the frets were mostly melted, and it worried me a bit. But I thought, I could have it refretted if needed. So, the first thing I ordered was a set of original Fender tremolo springs and some black screws for the pickguard.
With the springs and a set of new strings that I had laying around, I will be able to test drive the electronics and see if any part needs to be replaced before I decide what I wanted to do with the guitar. When I received the springs and installed them along with the strings I was already full of excitement to plug this baby again. I dialed to a clean sound on my Axe-FX, turned up the amp and hit a chord. No sound! I immediately knew the output jack was busted, this happened a few months ago to my other guitar, the Ibanez. I tried plugging it half way in, sometimes it does the trick, and yeah it works! My wife was there witnessing this magical moment and even she noticed how pure, clean and different the guitar sounded. If you’re aiming for a crystal clear and bright sound, you can’t go wrong with Fenders. They have a very distinguishable brightness and characteristic tone that I have never heard on any other guitar.
Onwards!
So now I need a new output jack as well, it’s a must. And I tried the pickup selector switch, it was making a lot of noise when switching, time to change it as well. But to my surprise, none of the volume or tone pots were making a noticeable noise when I tested them, just a very slight crackle on the lower tone pot, but it went away with a quick spray of contact spray I already had. I kept playing for a bit, and was enjoying my time when it hit me in the face while I was bending the second string at the 14th fret. It was like hitting a wall when you’re enjoying the drive, or like finding hair in the most delicious meal you’re having, or uh… like buzzing and cutting off the string sustain when you’re enjoying the bend. My fear has almost turned into a nightmare. Now all that’s going through my head is, how do I fix this, could it be the neck, no it can’t be. Maybe the string action is too low, nope. Something, just give me something other than refretting. I was out of options, so I contacted my beloved ex-bandmate Amr Rifai for advice, who now happens to operate his own handmade electric guitar workshop, Amorite. Amr told me I need to sand down and level the frets. When I gasped, he said this is something his 7 year old kid could do, and proceeded to tell me what I would need, and what a great guy, he shot a few videos in his workshop specially for me, explaining in detail on how to accomplish this daunting task. Buckle up Shant, I told myself. You’re about to go on a new journey, and win some luthiery experience points.
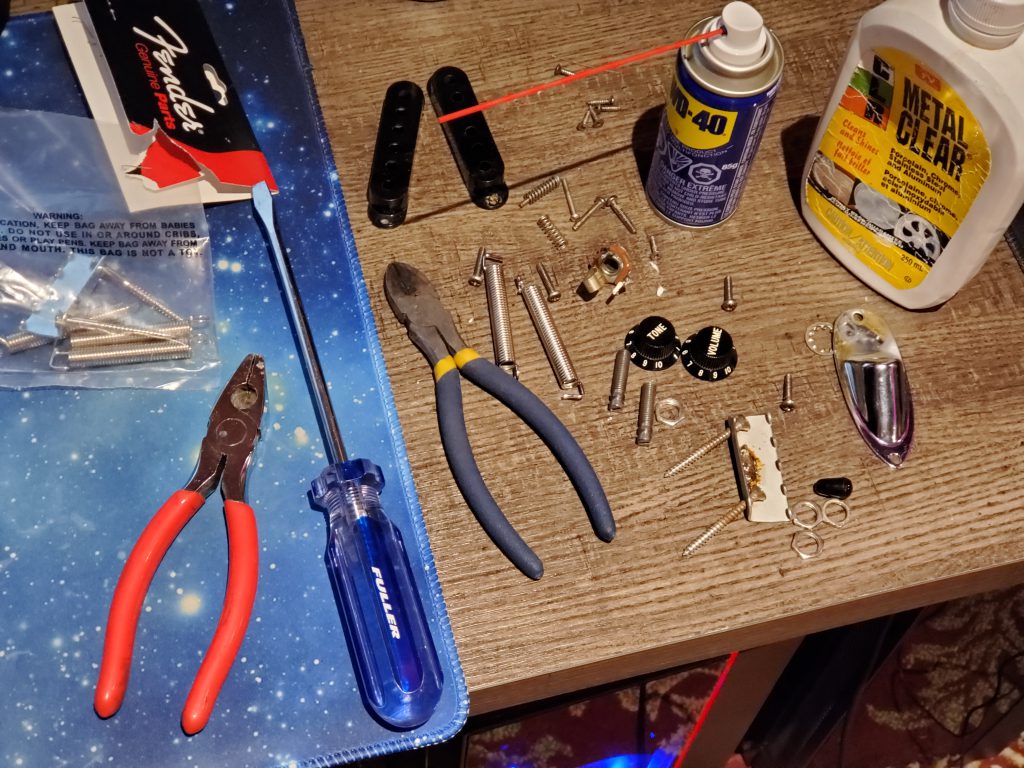
And so I bit the bullet and placed some orders for all the tools I needed:
- A notched straight edge
- A fret leveler
- A fret Rocker
- A fret Crowning File
- A variety sandpaper, from course to fine
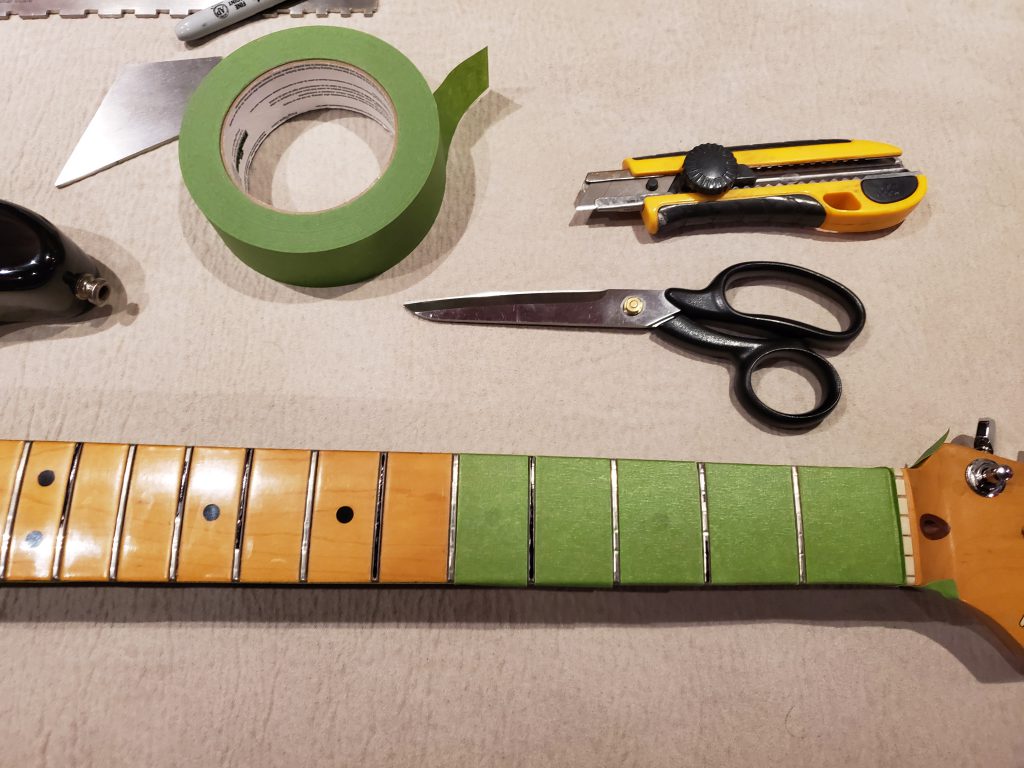
- Masking tape, which I already had
- Steel wool
- Sharpies, which I have a lot laying around
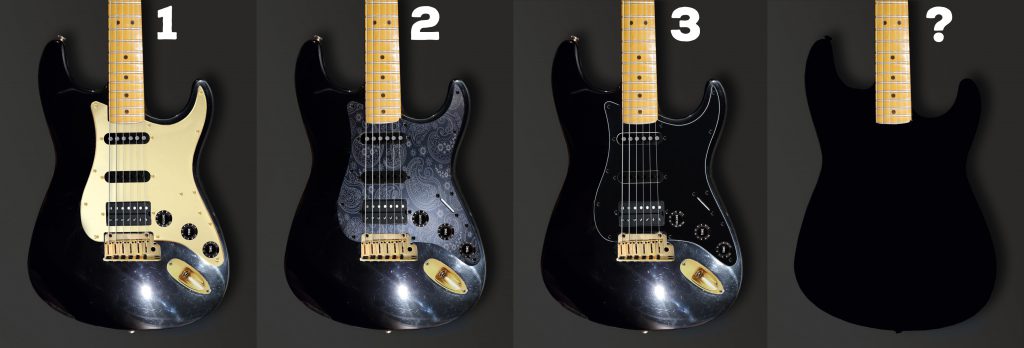
In the meantime, I wanted to do some photoshopping to decide on what to change in terms of looks. I thought black and gold would be nice, knowing that Fender carries gold replacement parts. And while I waited for most of the fret leveling tools to arrive, I went ahead and ordered a few of the necessary parts, namely the selector switch and the output jack with a gold plate.
I made 4 mock ups in Photoshop and posted them on my Facebook page and asked my fans and friend for their opinion. Most of them voted for #2. Which is what I was secretly hoping they do. 😉
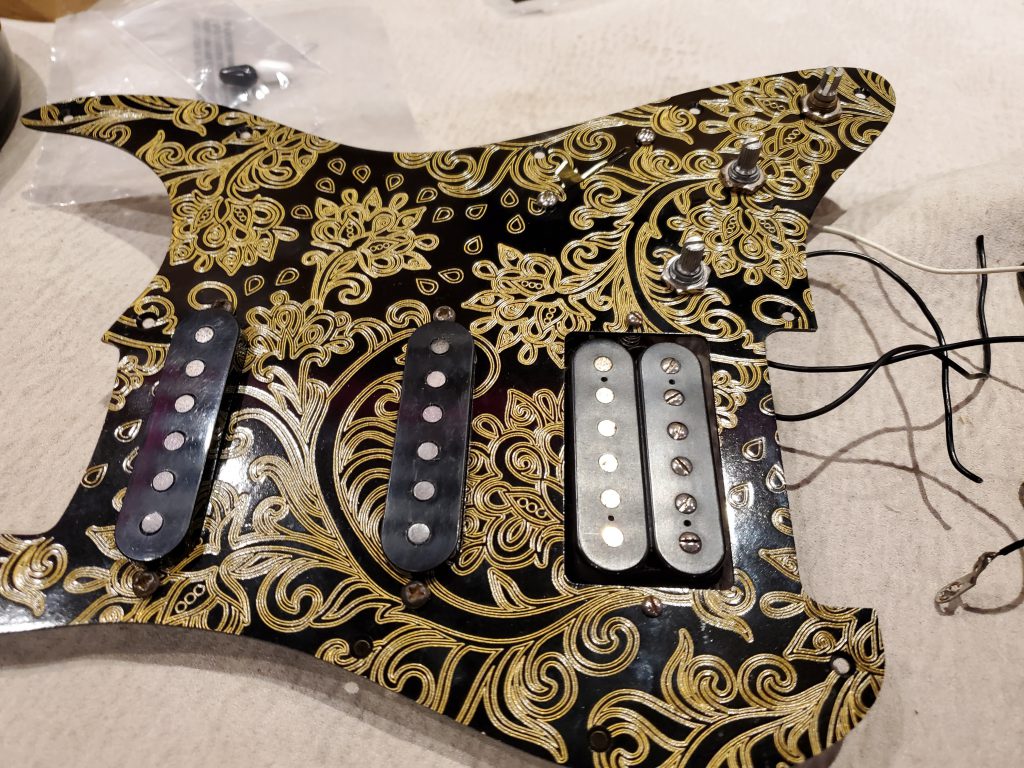
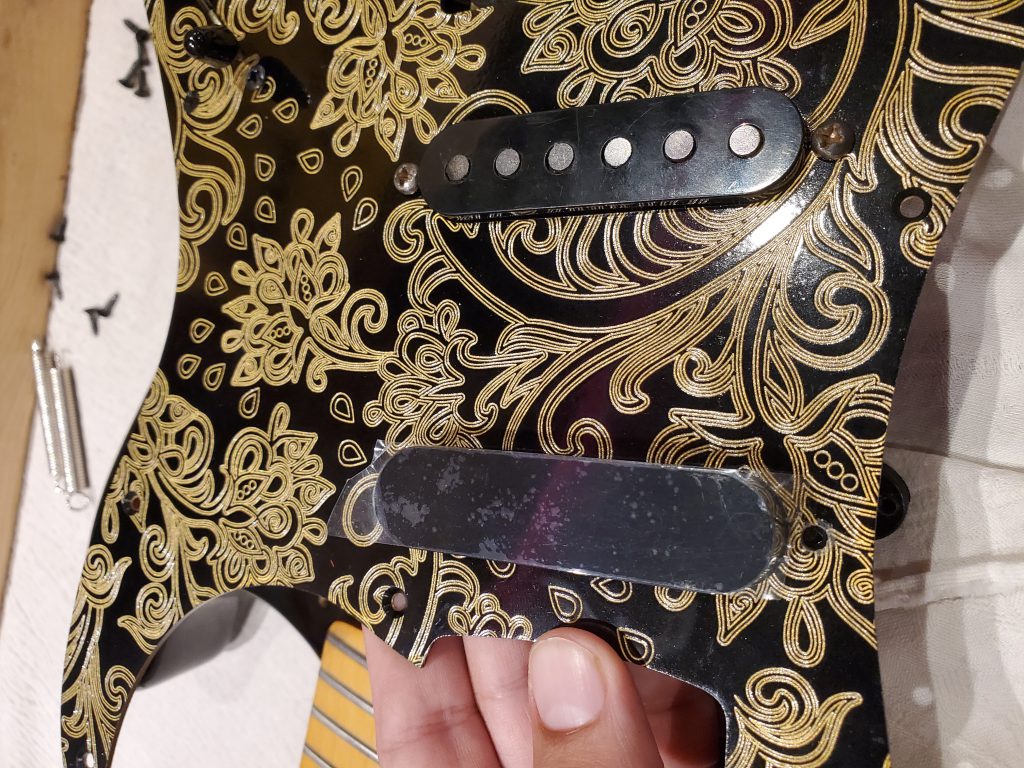
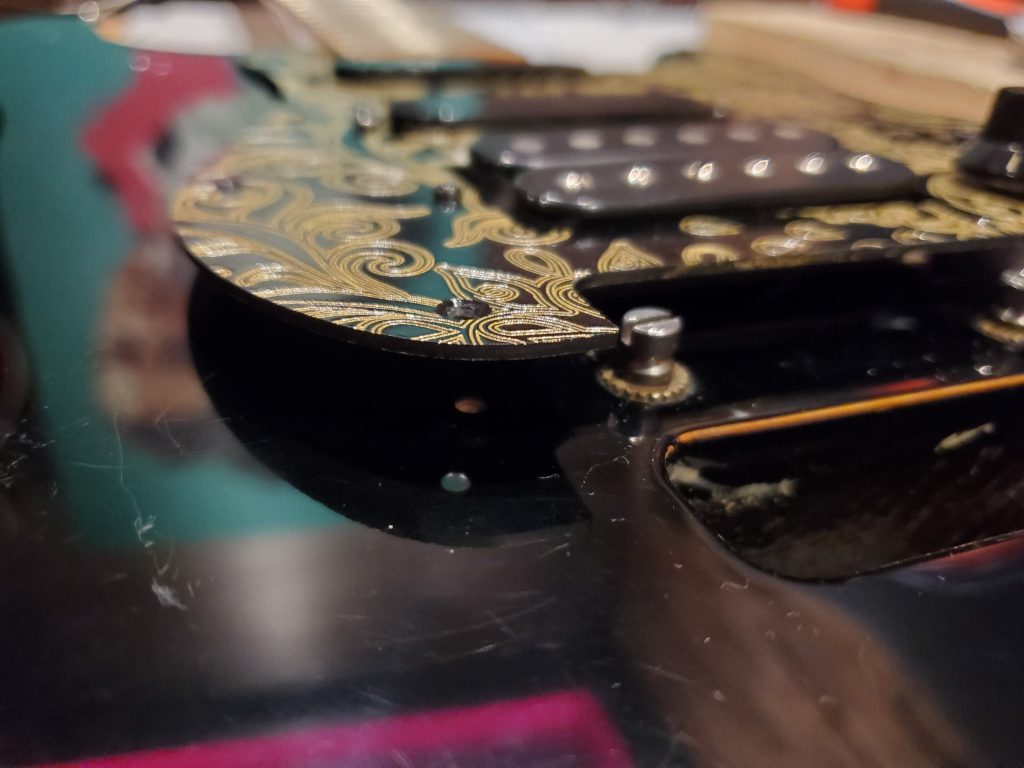
But then I found a new pickguard that is a great fit, and compliments the hardware a lot better with its golden motives, and I did yet another photoshop mock up with the new pickguard.
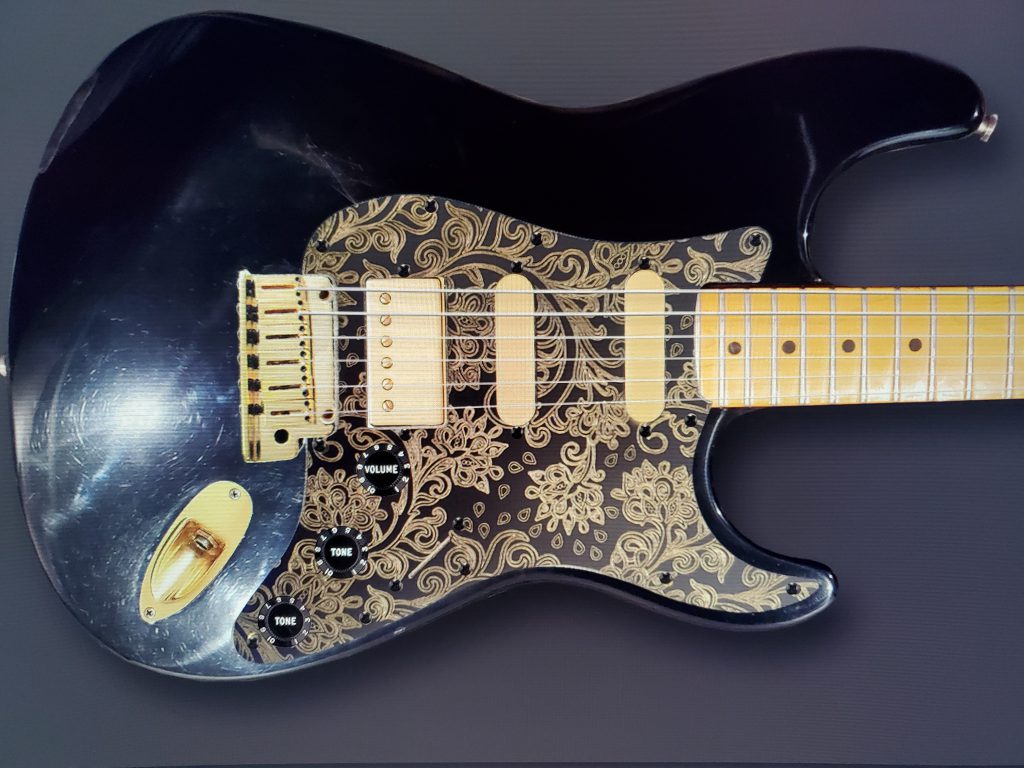
This one is a winner! Time to take it all apart and give it a good clean.

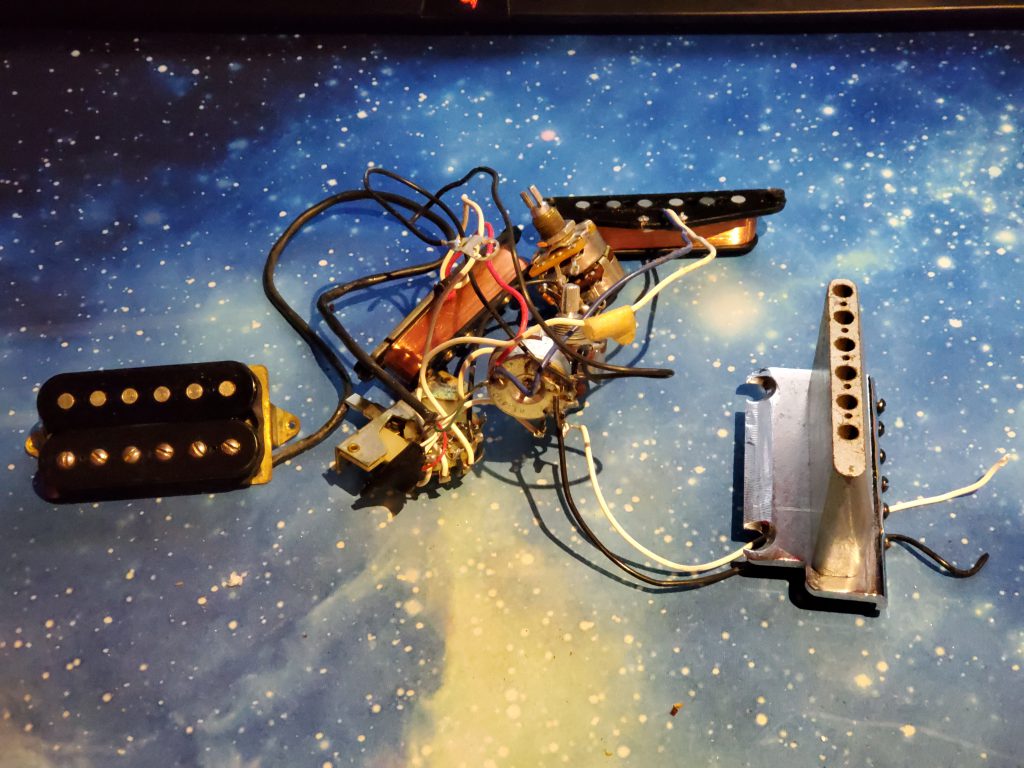
I tried using some CLR and WD-40 to get rid of the accumulated rust on the pickup magnets. It helped a bit, but I settled for ordering a black cover that will hide all that and give it a slick look as well.
A couple of days later, the selector switch and all the tools for leveling the frets have arrived, along with the new pickguard.
Enter, operating theater.

The procedure for the first step is basically leveling the neck using the truss rod and making it as flat as possible (scary!) and check with the notch edge ruler for the straightness.

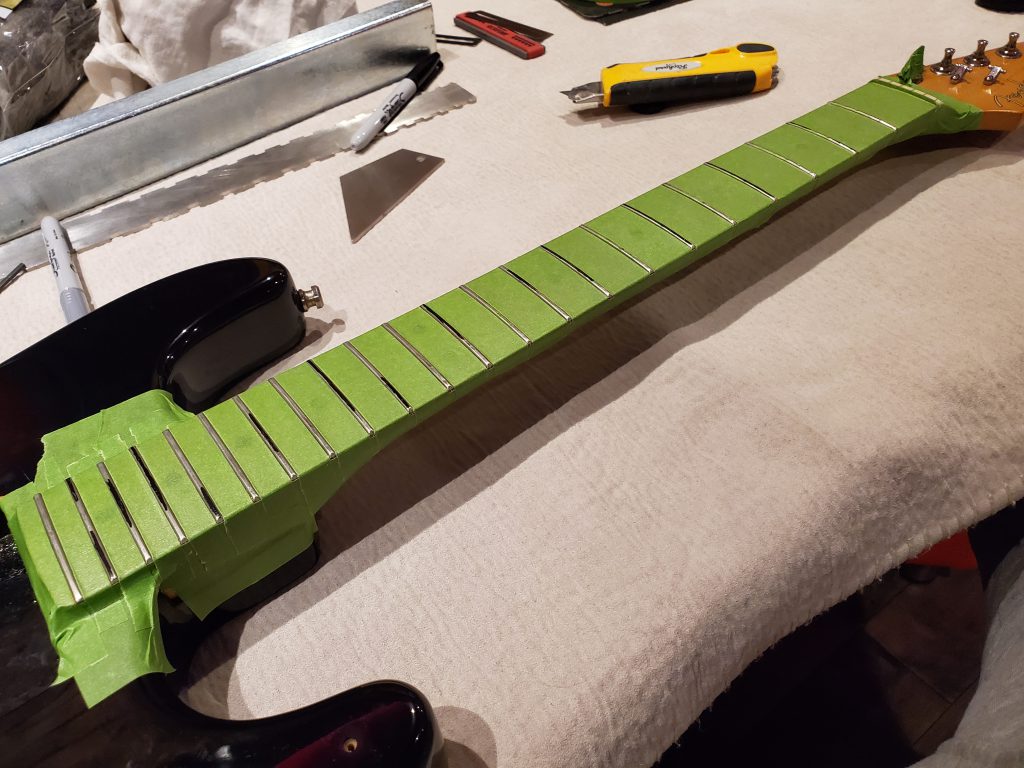
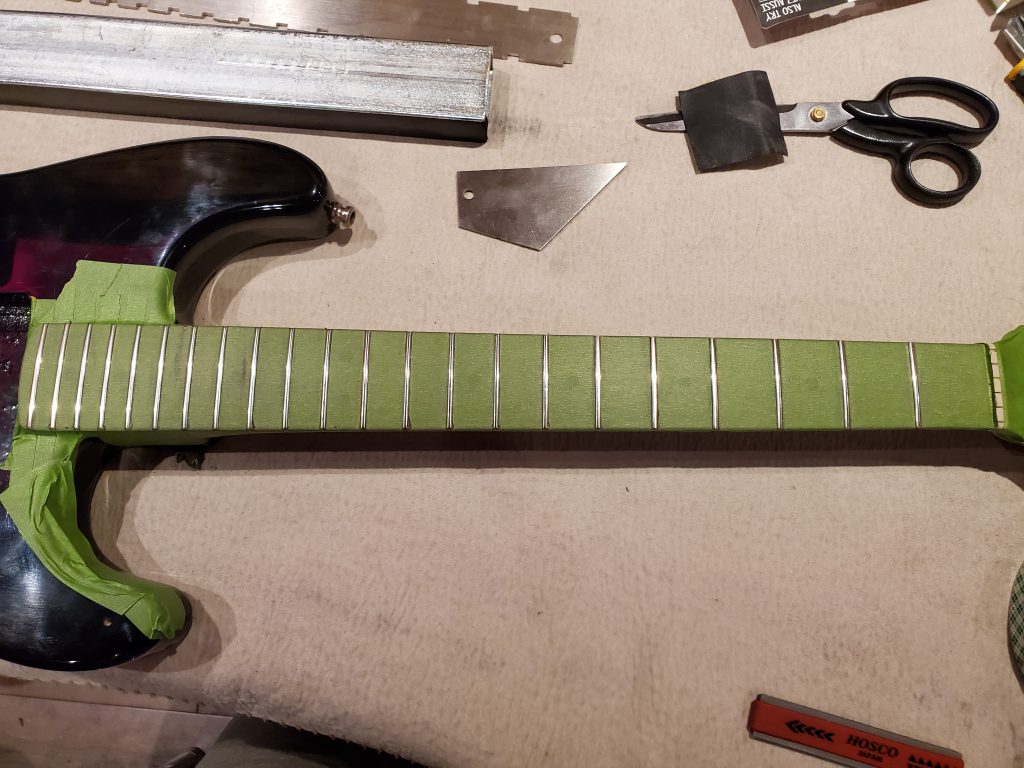
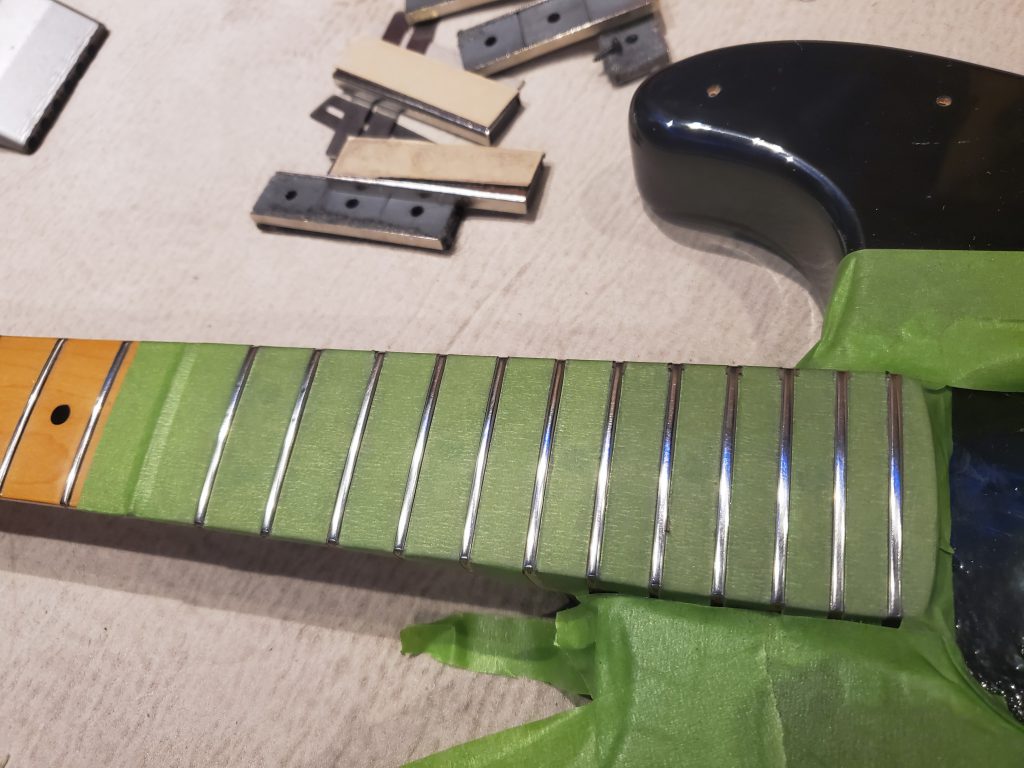
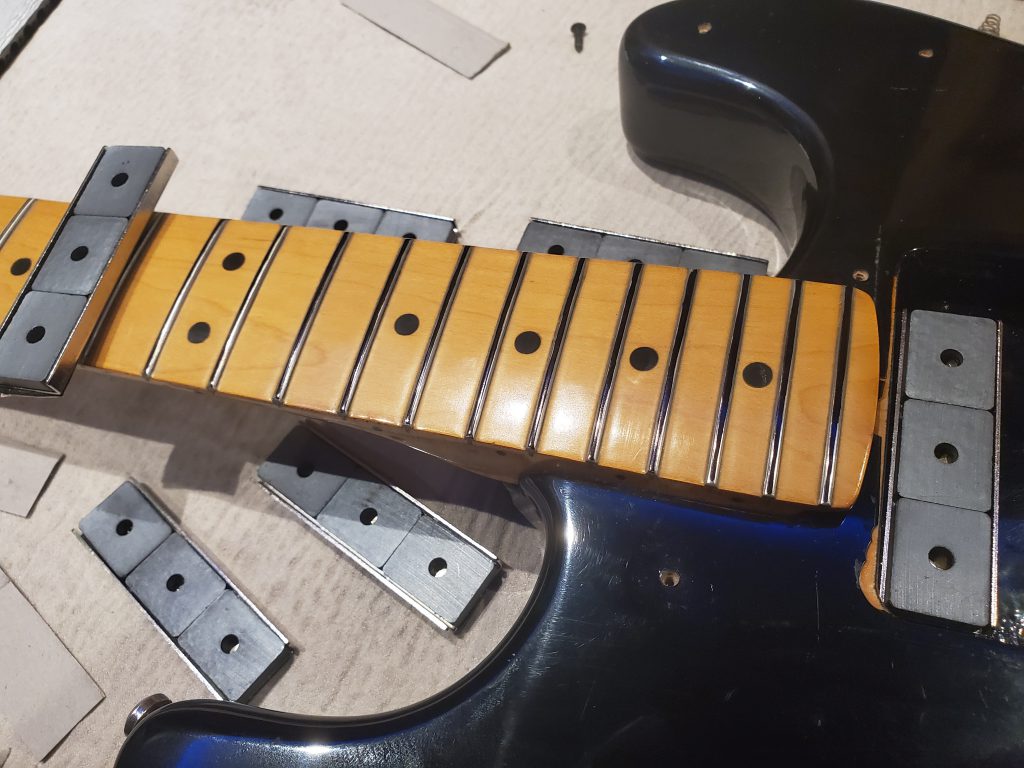
When it looked flat enough, it was time to mask the entire fretboard and part of the body, leaving the frets exposed, to avoid any accidental damage.
The next step was marking all the frets with a sharpie and start sanding with the leveling bar and a coarse sandpaper. The sharpie will help you identify which frets are higher and which are lower, after you sand for a bit, any frets with no marks means those were high frets, and anything with the sharpie mark still showing, means it is untouched. I used a double sided tape to fix a course sandpaper on one side of the leveling bar, and started moving the bar along the fretboard back and forth without applying any pressure, and making sure I cover the entire length of all frets. I repeated this process until most of the marked frets disappeared.
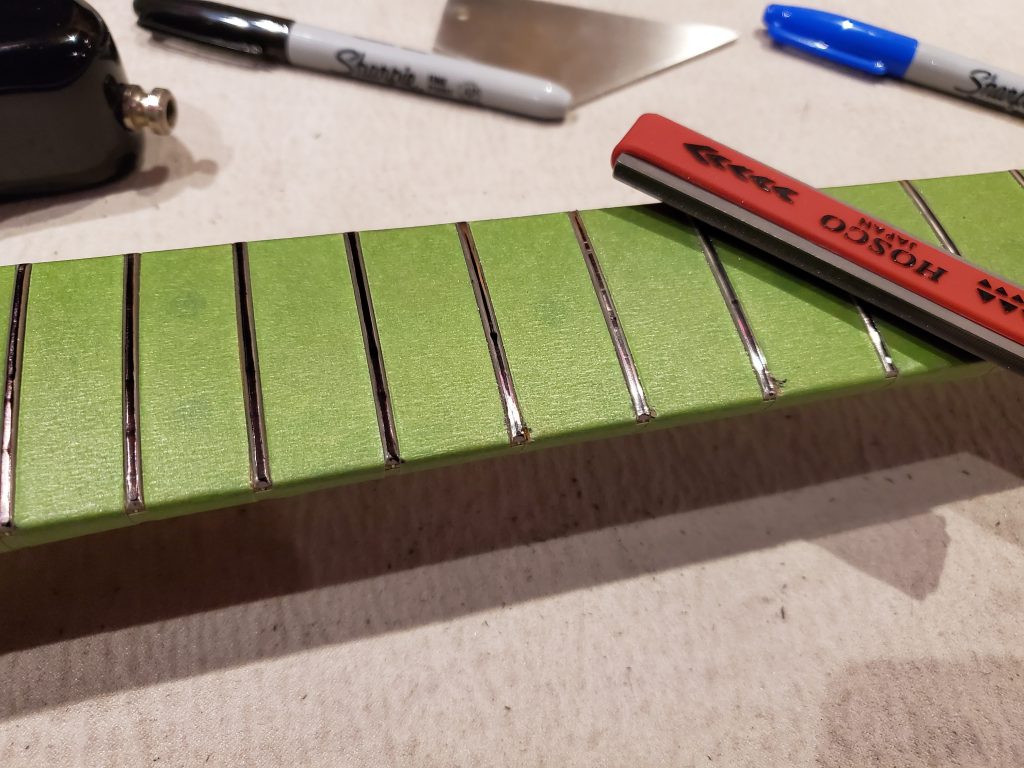
Now it’s time to use the fret rocker and do another check on each fret. Sometimes you have frets that is higher at the lower strings, or higher at higher strings, this is where the rocker comes in handy. The principle is to rest the rocker flat along three frets and start rocking it back and forth. If it rocks, it means the middle fret is higher than the other two. I repeated this steps at three locations on each fret; top, middle and bottom. This time, I used the sharpie to only mark the part of each fret that was higher. You can see the higher parts on my frets in the picture below.
And you keep sanding away, and repeating this process until it’s all level.
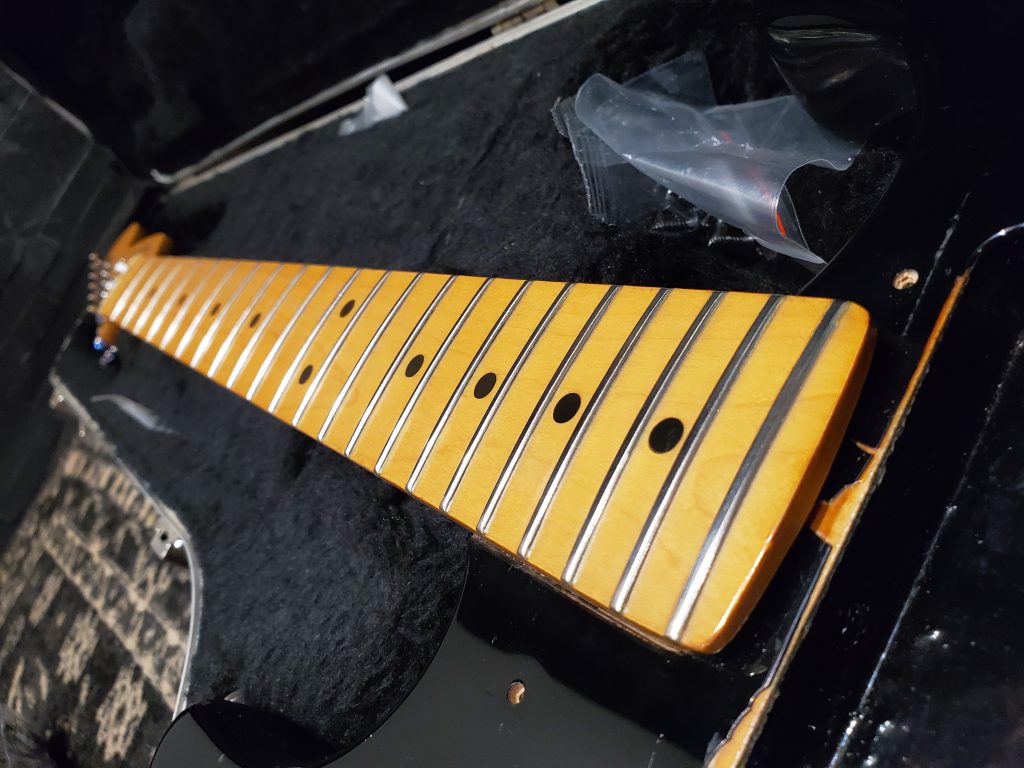
Now it’s time to file it with the fret crowning file, this will bring the frets back to their original arched shape.

Once again, we mark all the frets with a sharpie and file away until we are left with a thin line in the middle of the fret. My file had two sides, coarse and fine. It’s pretty easy to use, just place it on each fret and grind up making sure you follow the curvature of the neck to cover the entire length of each fret equally.
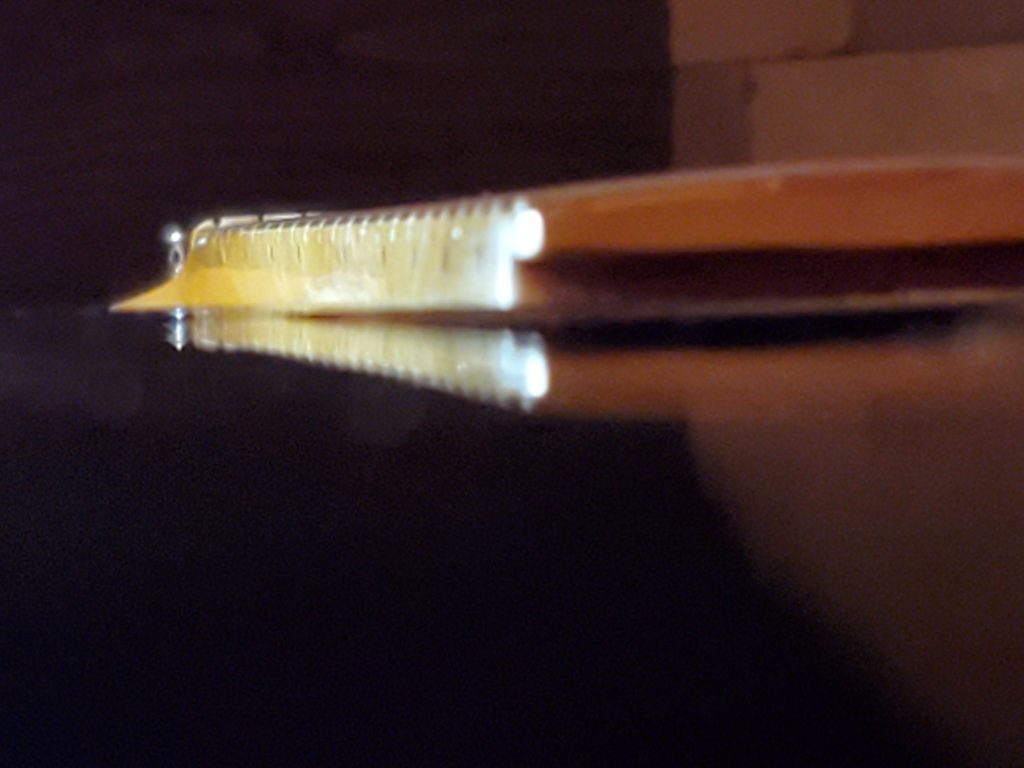
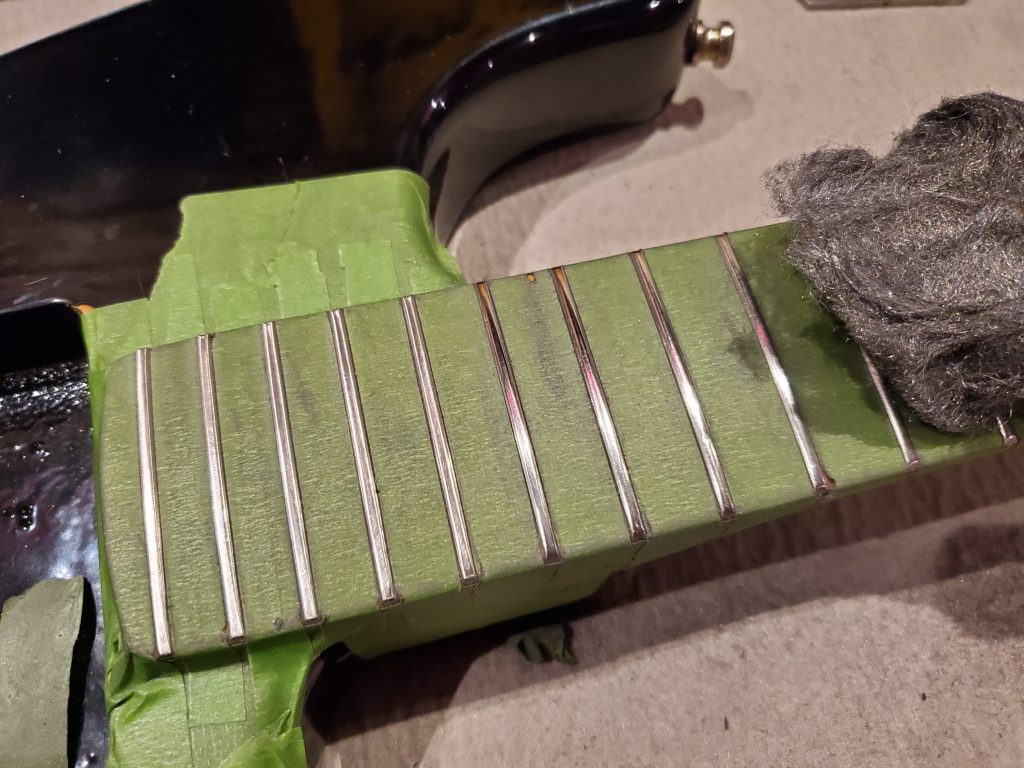
This is how the frets looked after I was done filing.

Next up, using a thin plastic card or a credit card with a sandpaper wrapped around, to smooth the sides of each fret one by one. You need to repeat this process with different sandpaper grits, 600, 800, 1000, 1200, 1500 and 2000. This is by far, the most cumbersome and repetitive step in the entire. It has to be done, otherwise your fingers will feel the rough edge of the frets while playing, as a result of the filing process.

When I was done with the entire fretboard, it was time for the last step before giving it a try. The last step is pretty fun, all you have to do is work the frets with the steel wool. The steel wool will get rid of any sharpie marks residue and make the frets look extremely shiny and smooth. It is important to note here that I felt my throat itching after using the steel wool, I did not know that this thing releases flying micro particles in the air. When I asked Amr, he laughed and said he forgot to tell me to keep a magnet nearby. Oh well, the damage is done.
We’re done here! Time to remove the masking tape, put it back together and give it a try.
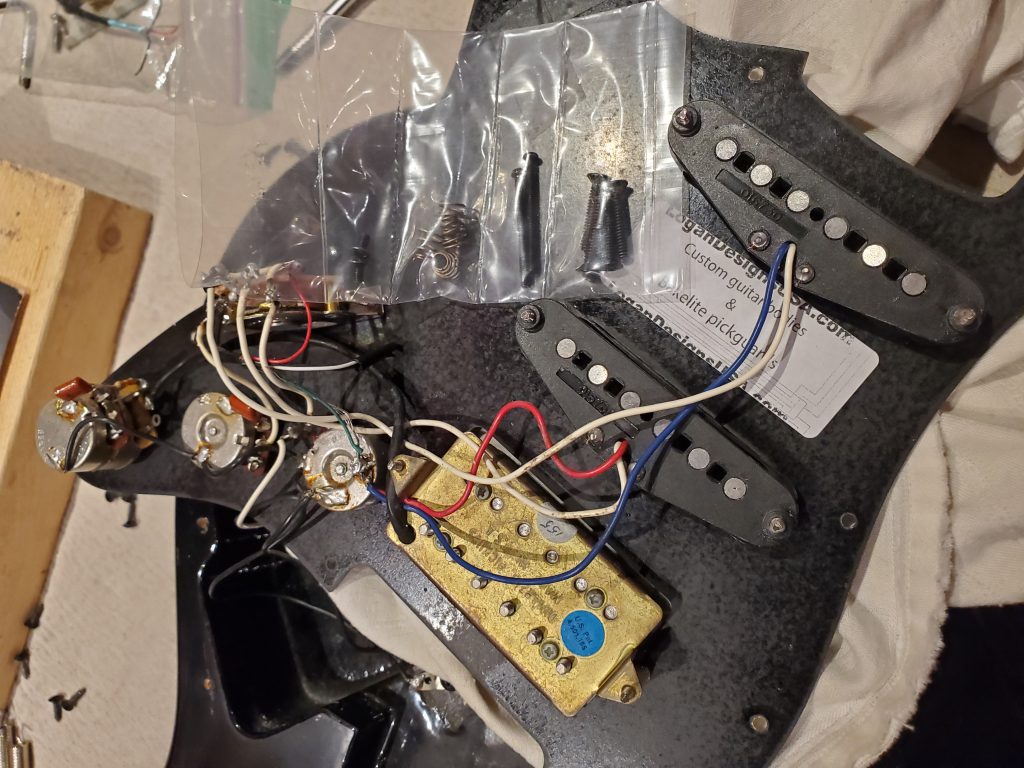
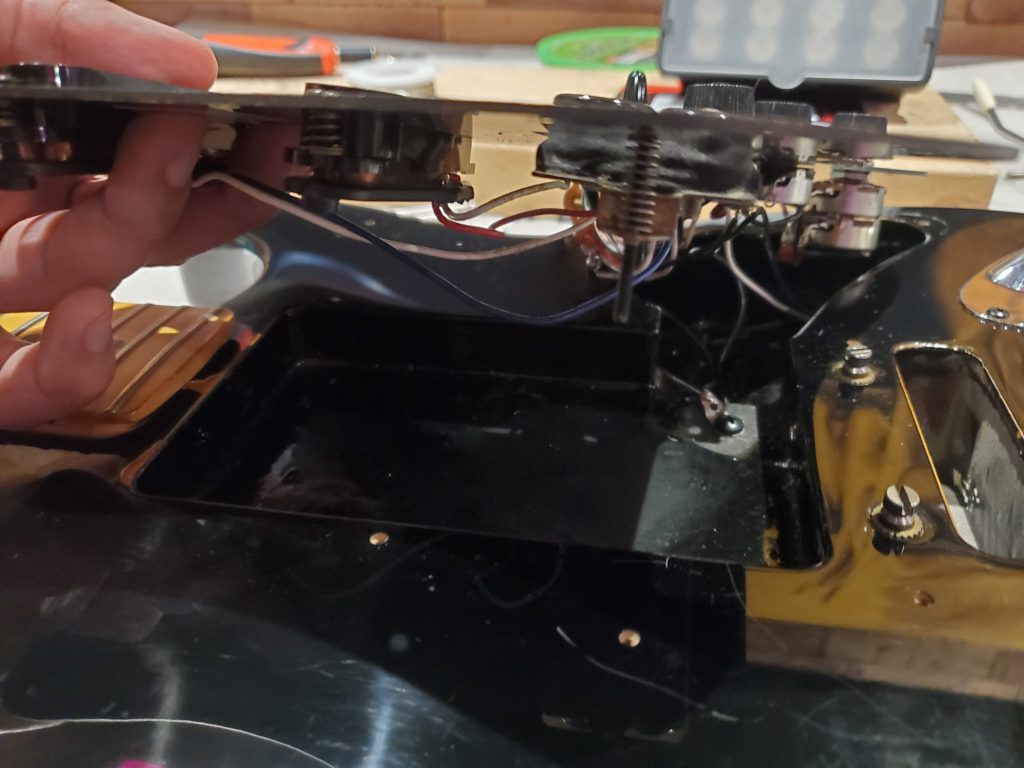
But before I did that, and since I had the new pickguard, I wanted to replace the selector switch while the guitar was taken apart.
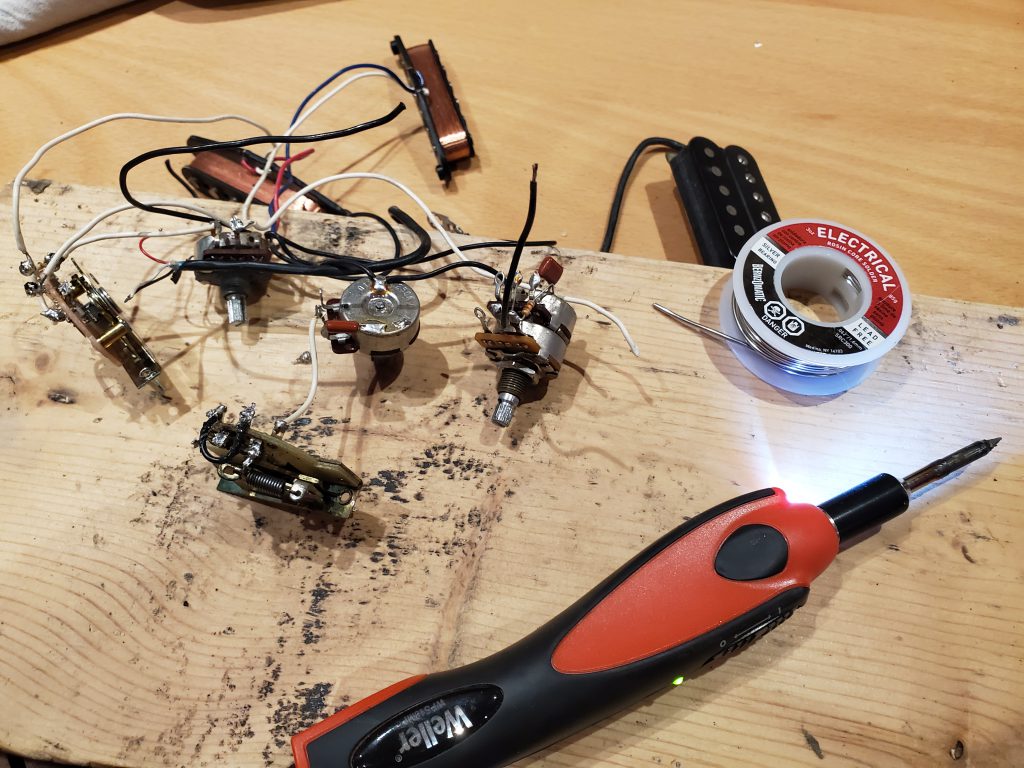
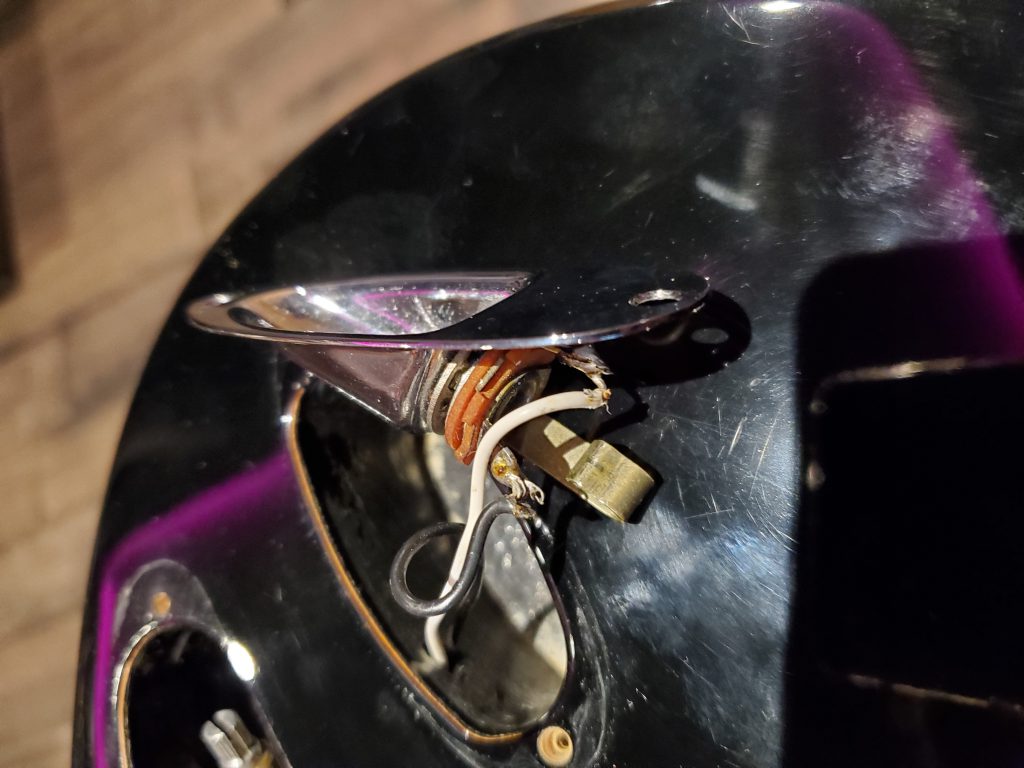
I don’t exactly know the science that goes behind soldering the selector switch, but I thought if I mirror the wiring to the new switch, it should be operate as intended.
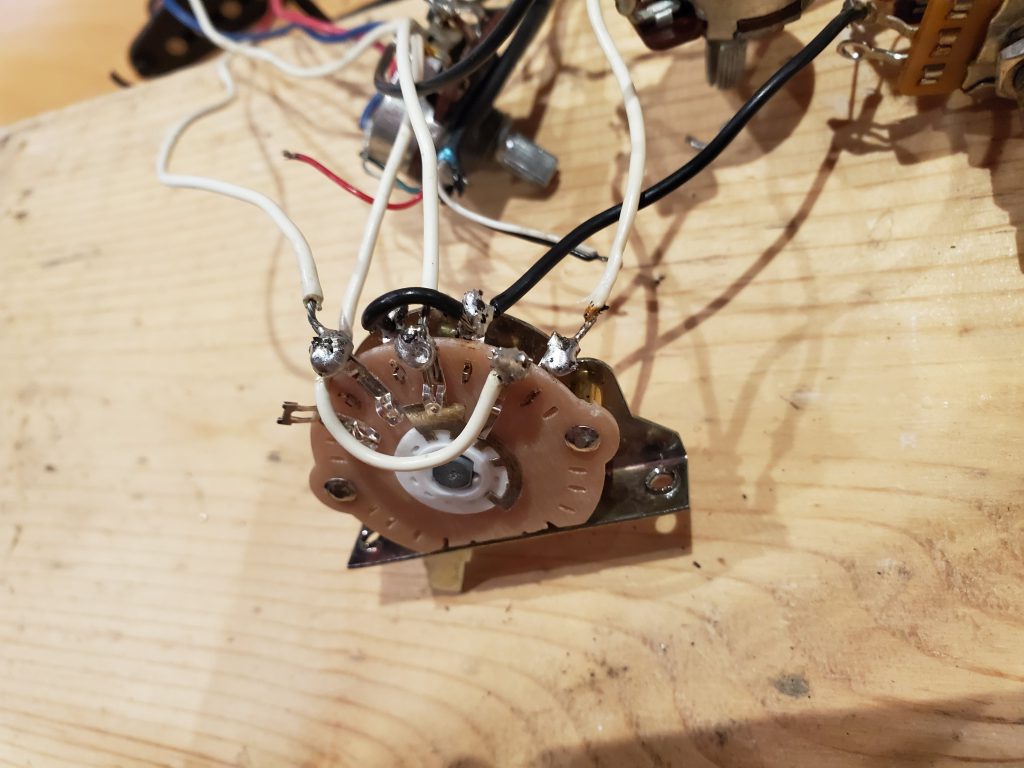
Now I’m not a professional soldering soldier, but I think I did a good job with the tools I had.
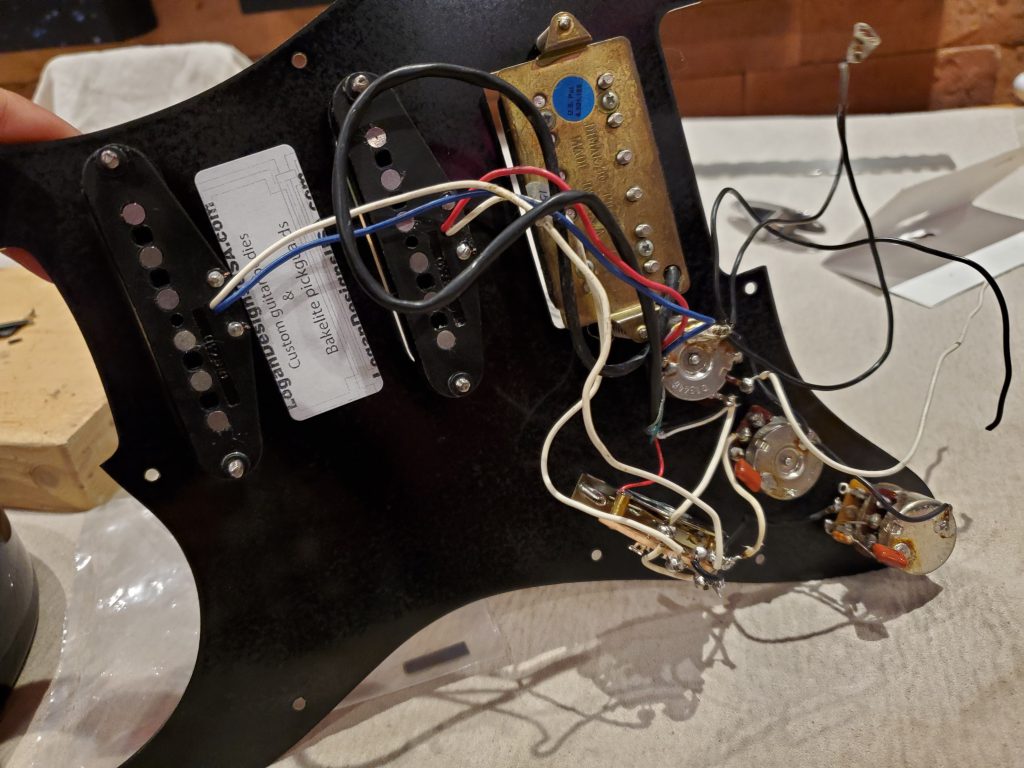
I did not have the new output jack yet, so I had to use the old one for now. At this point I’m both excited and worried to know if all the effort was worth it.
So I put everything together and plugged it in.
The operation was successful! I can now bend without any buzzing or silencing the strings. I specifically checked where it was doing that most, all gone! 😀
Well, I’m not gonna brag. When I showed the results to my luthier friend Amr, he suggested I file the higher frets a bit more since they looked flat in the photos I sent him.
So, once again, I masked the higher frets (12 and up) and repeated the filing and step, and then the long sanding step using the credit card method, and finally the steel wool; this time I used tons of very strong magnets and I was wearing a mask as well. 😆
When I was done, I plugged it in again and gave it another try, and it sounded great.
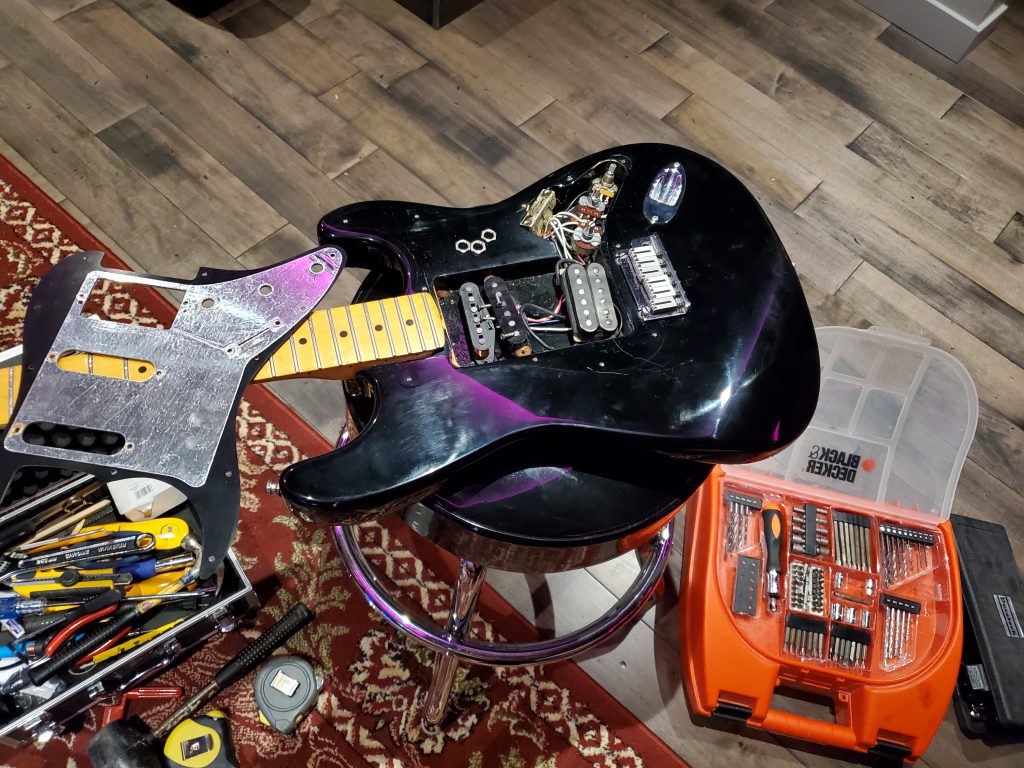
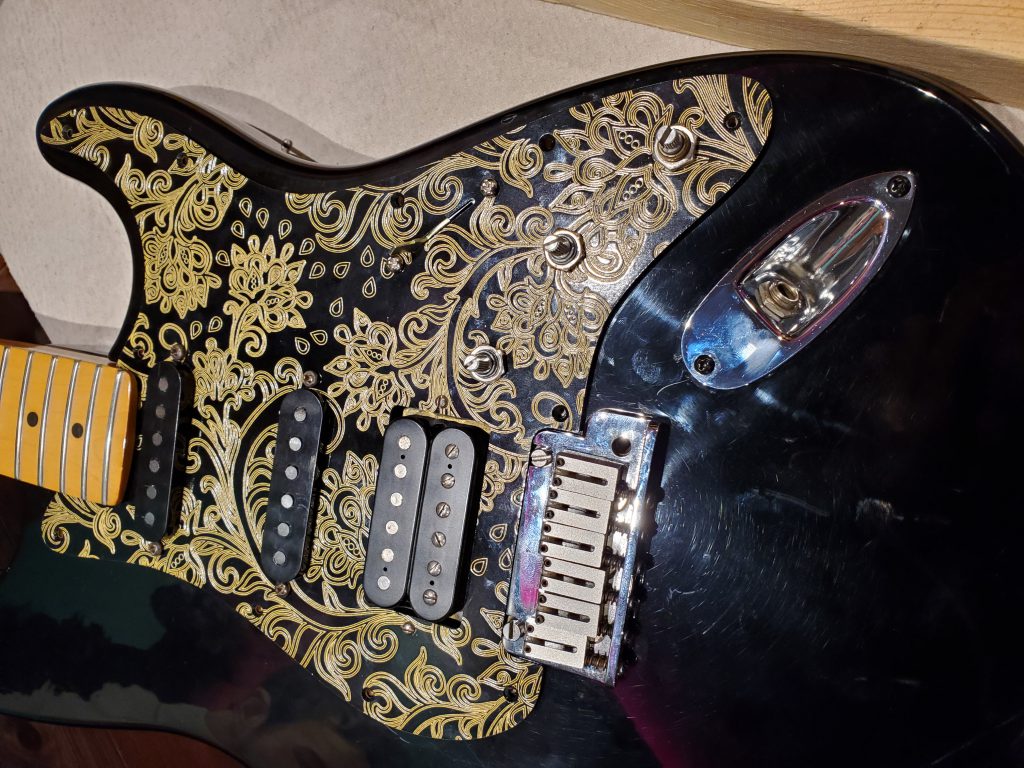
Then some aesthetic items arrived, pickup screws, height springs, blank pickup covers, and the gold output jack.
Time to take it apart again and install those items.
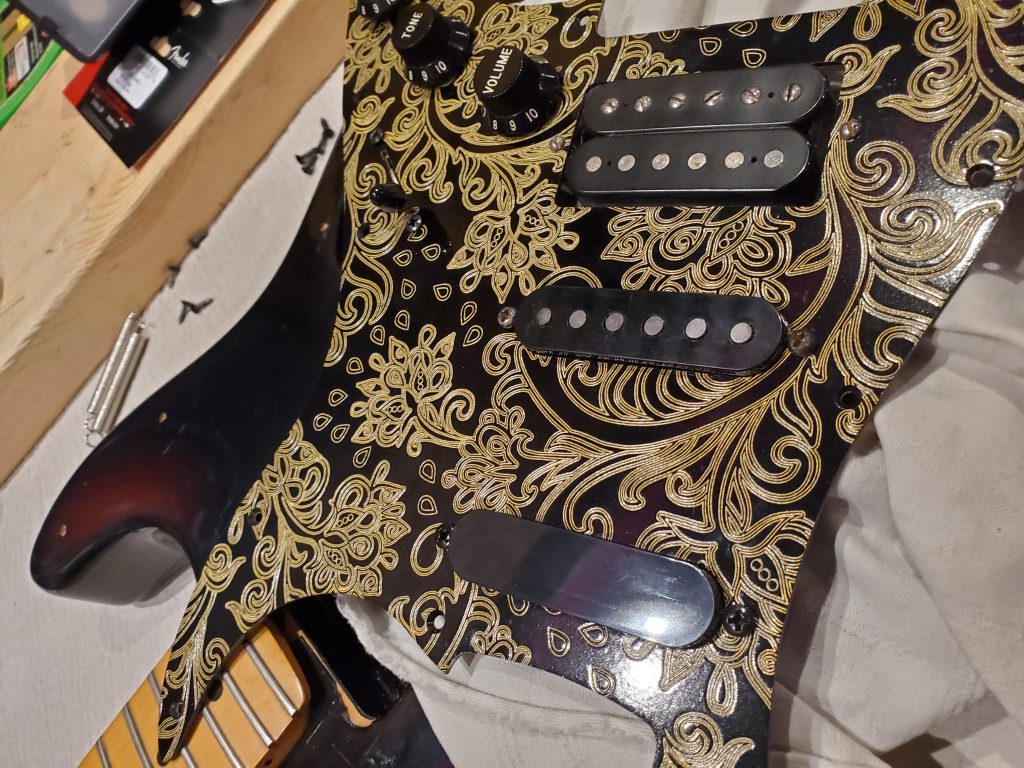
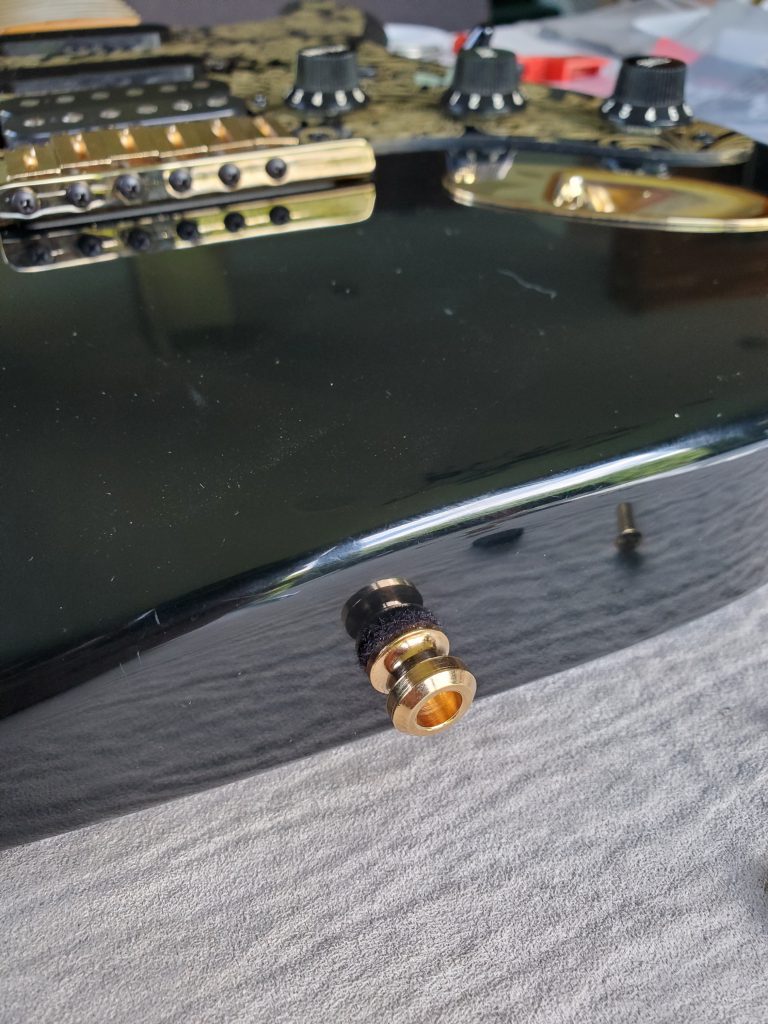
Problem #1: The humbucker pickup height screws were a bit long, and it was preventing the pickguard to sit in place, so I had to improvise with a pair of pliers and trimmed the excess ends making sure I don’t end up with a small room for height adjustment.
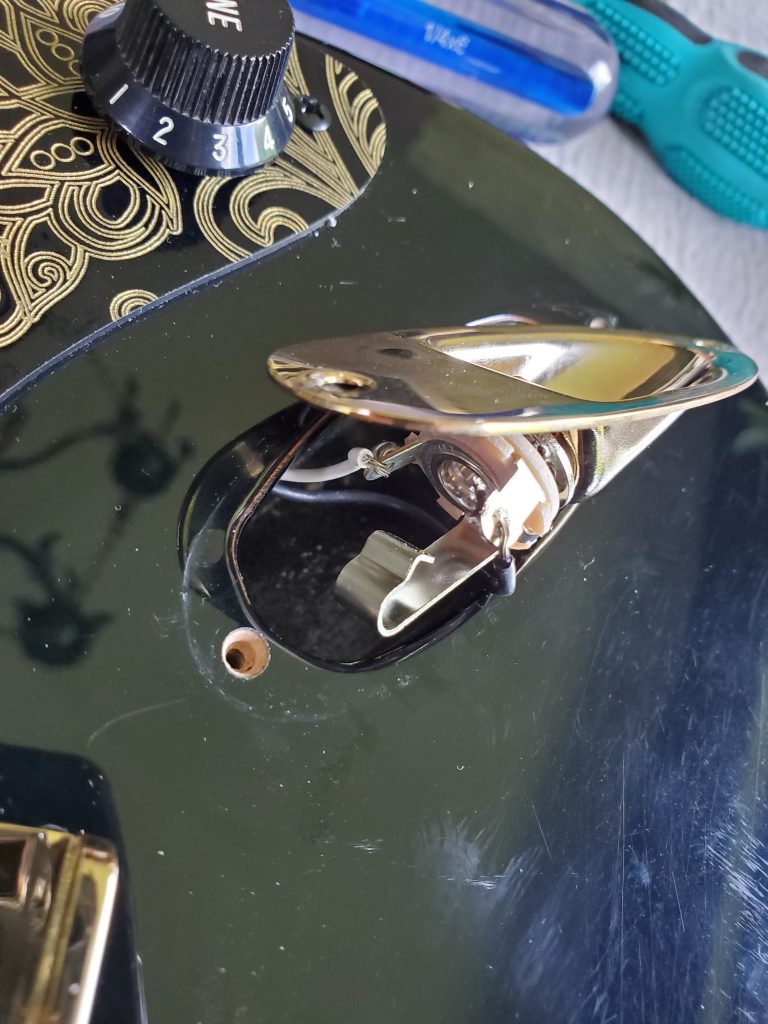
Problem #2: The gold jackplate arrived broken, because the seller shipped it in a padded enveloper instead of using a box. I had to return it and asked for a replacement.

When the replacement arrived, the soldering ends were ok this time, but I ran into another problem that I didn’t even notice when I got the first item.
The plate was not made by Fender, so it did not sit well in its place when I tried it on. Luckily though, I haven’t started the soldering process, so I was able to return it again.
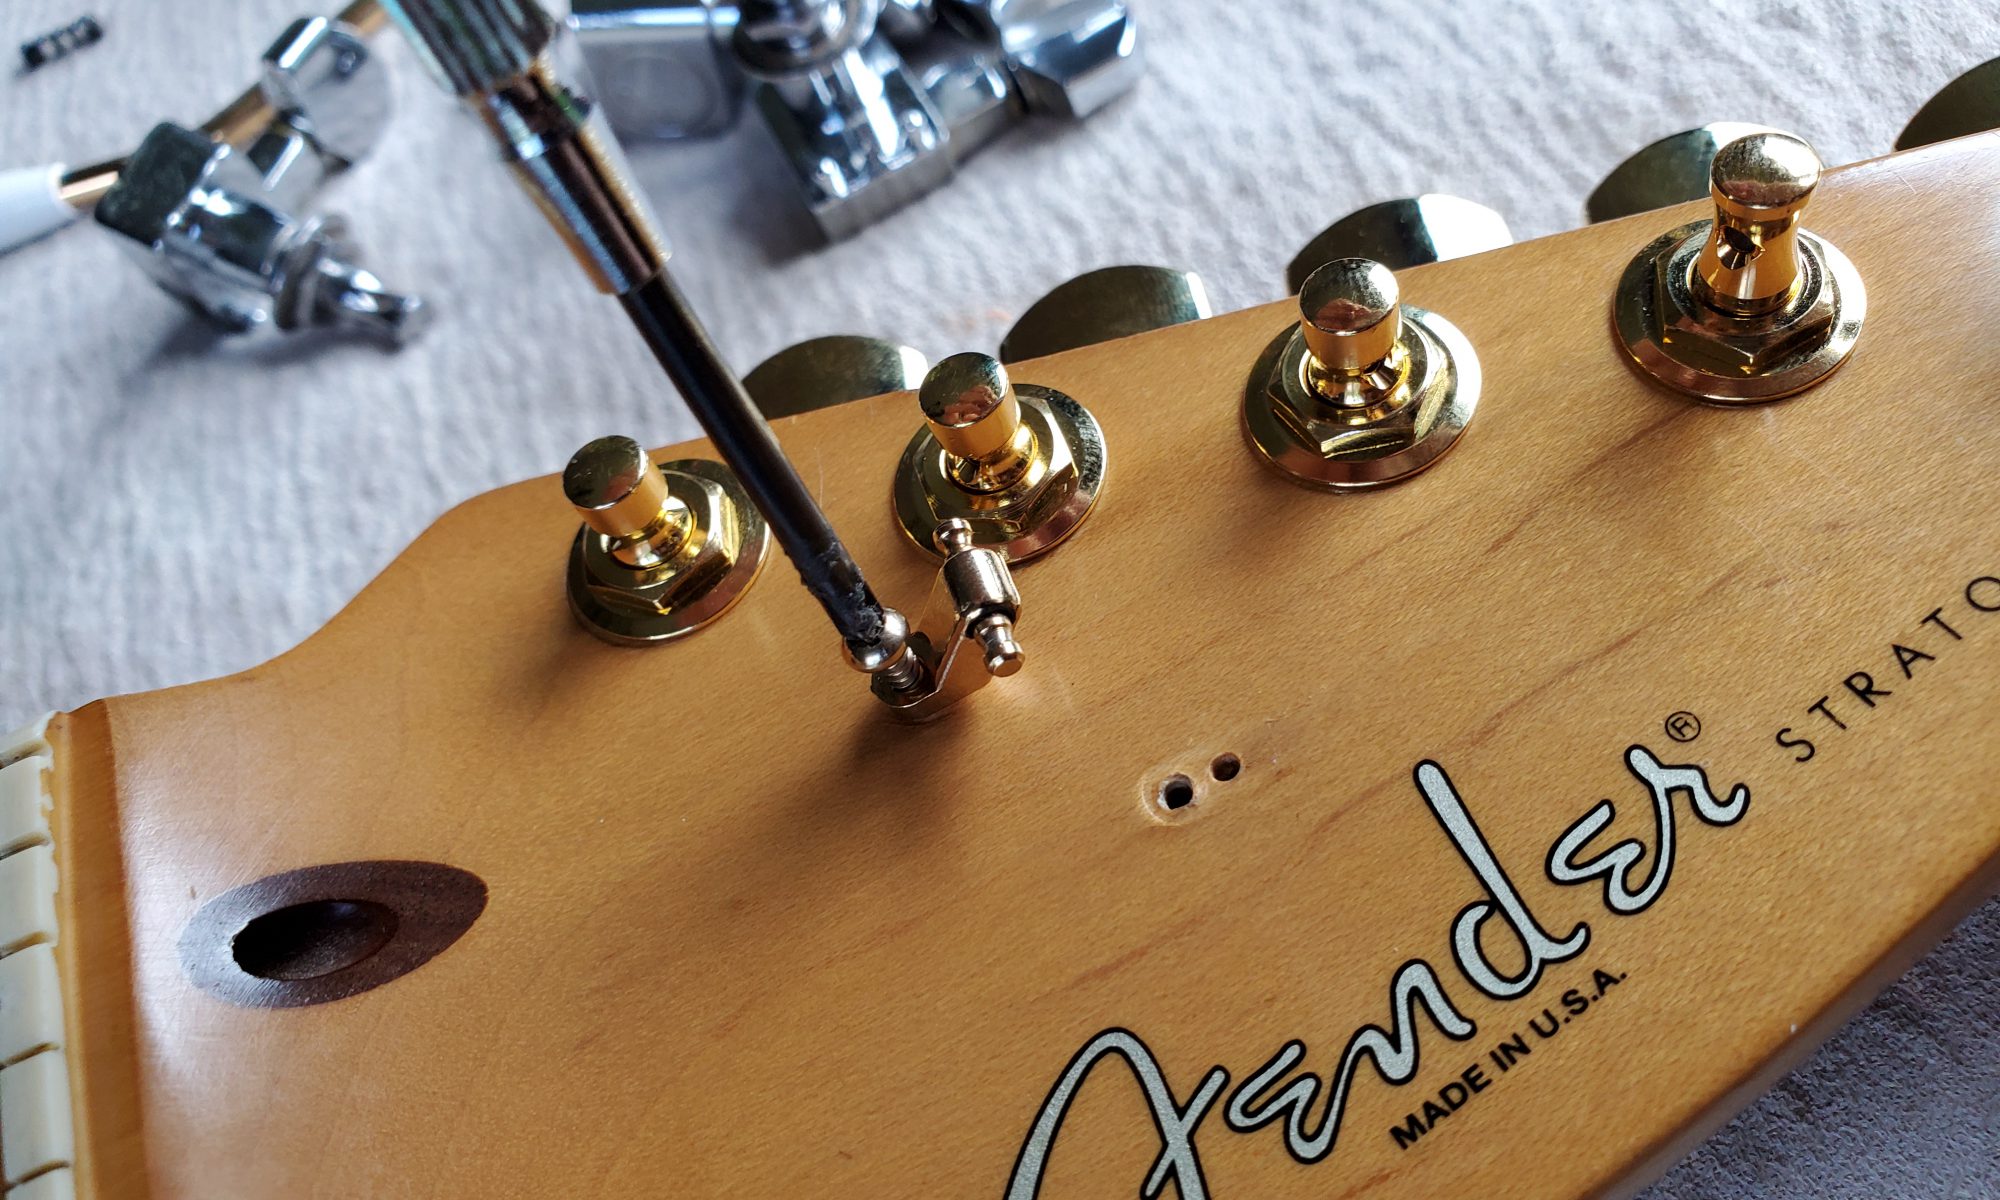
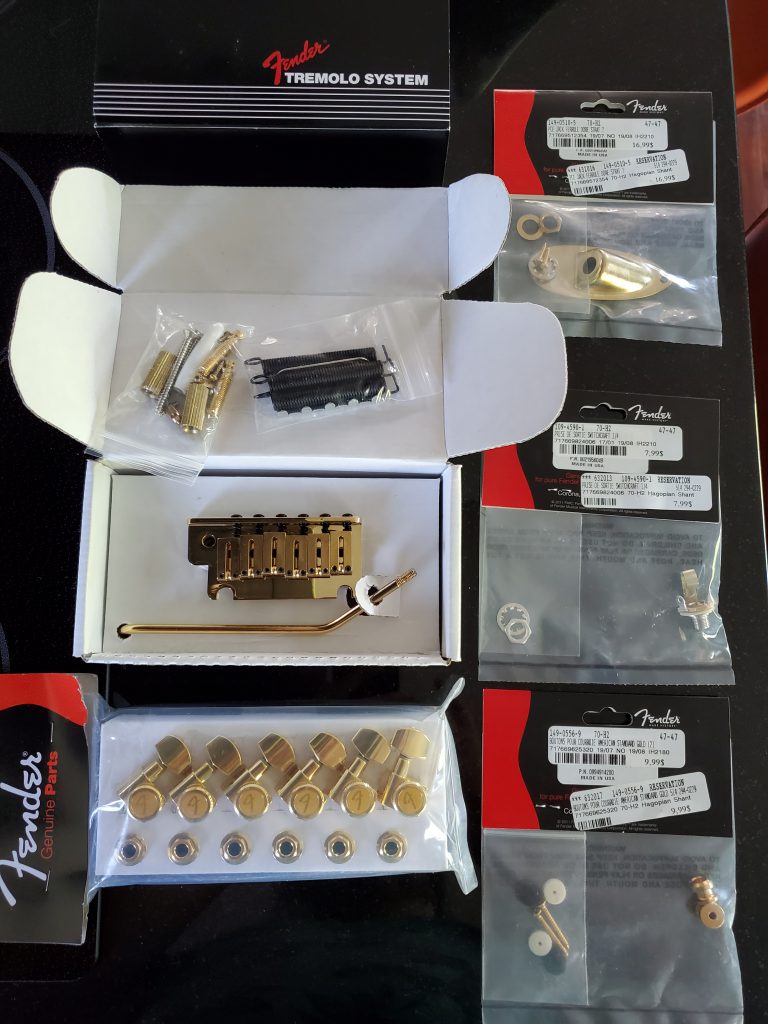
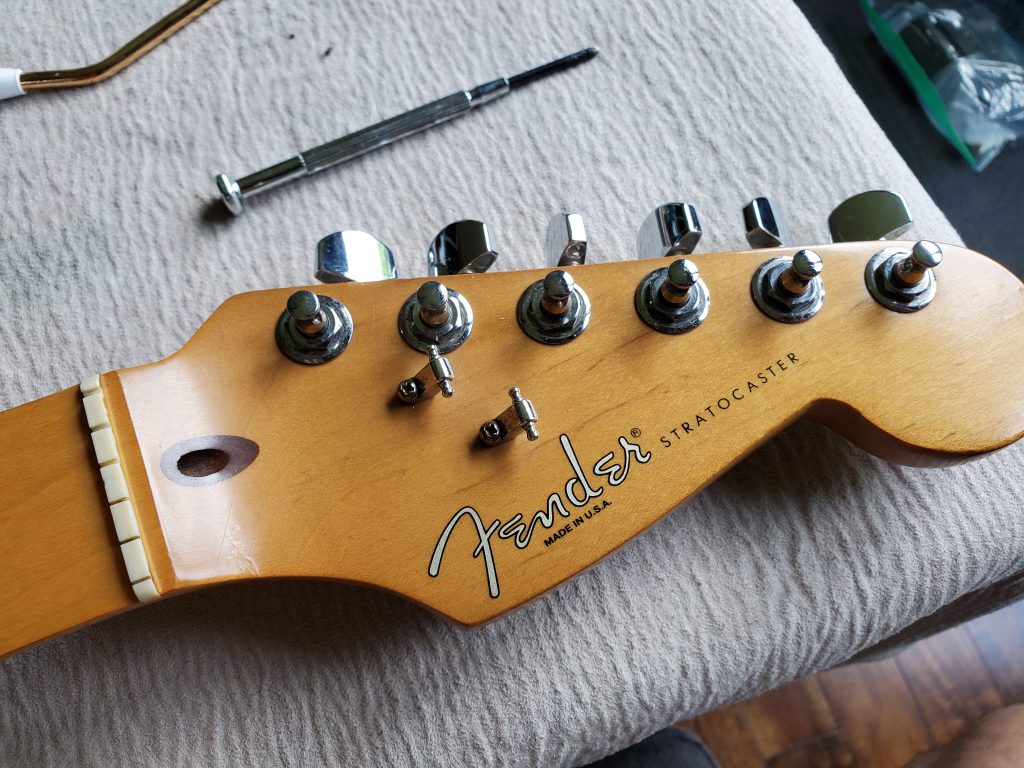
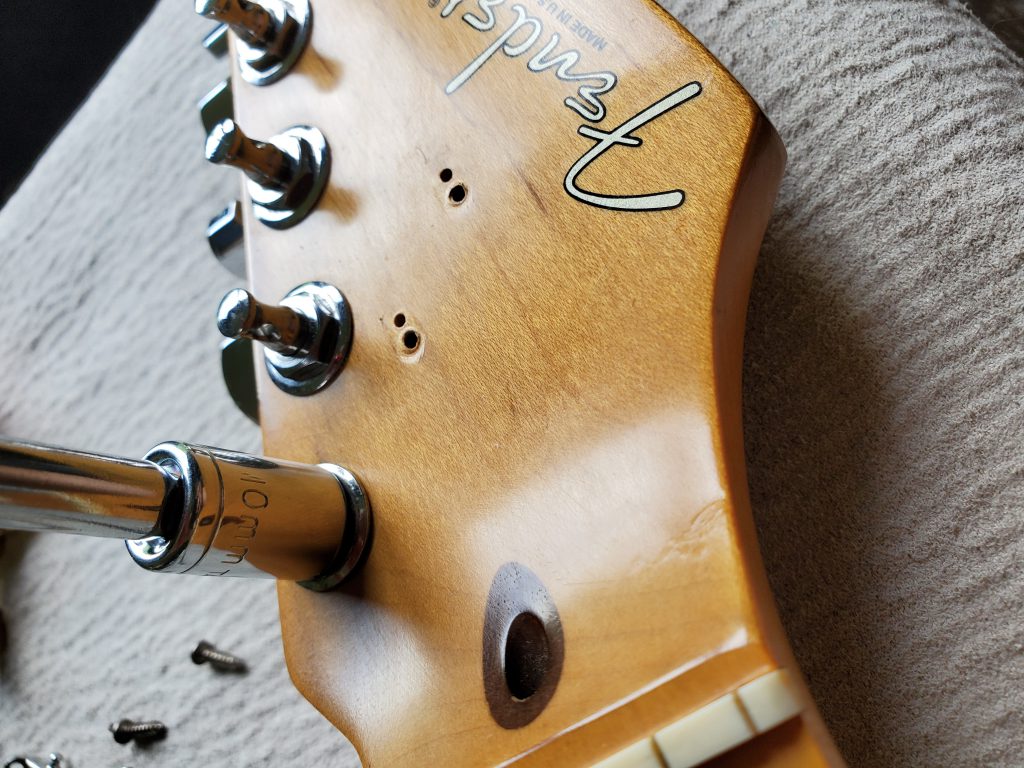
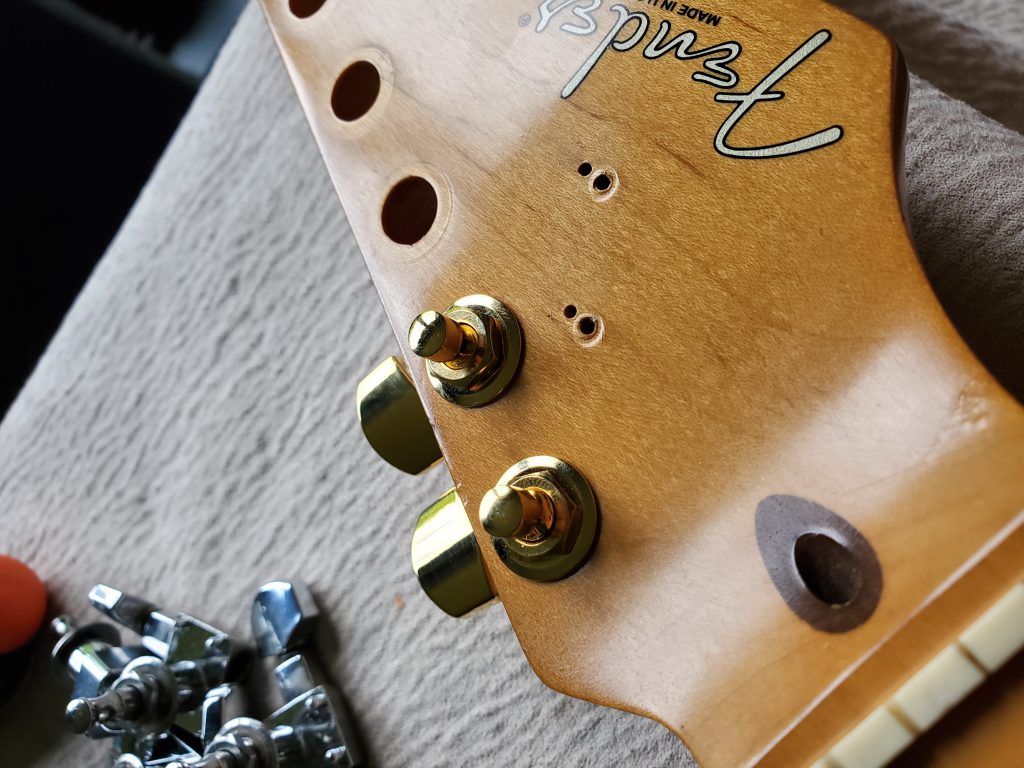
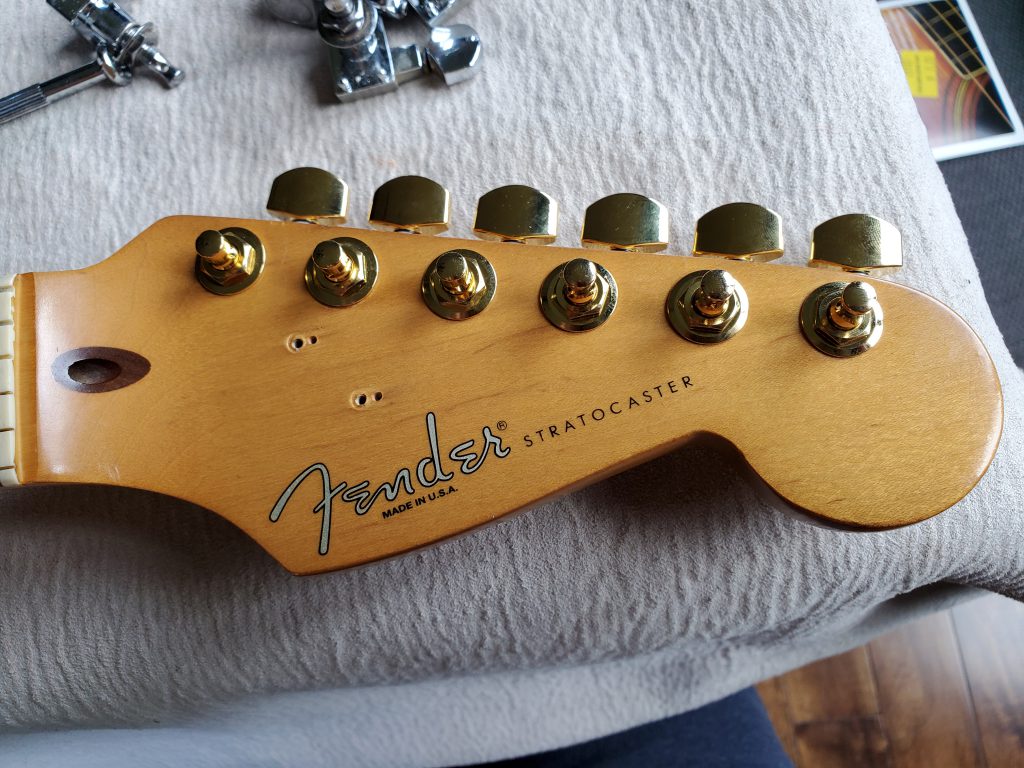
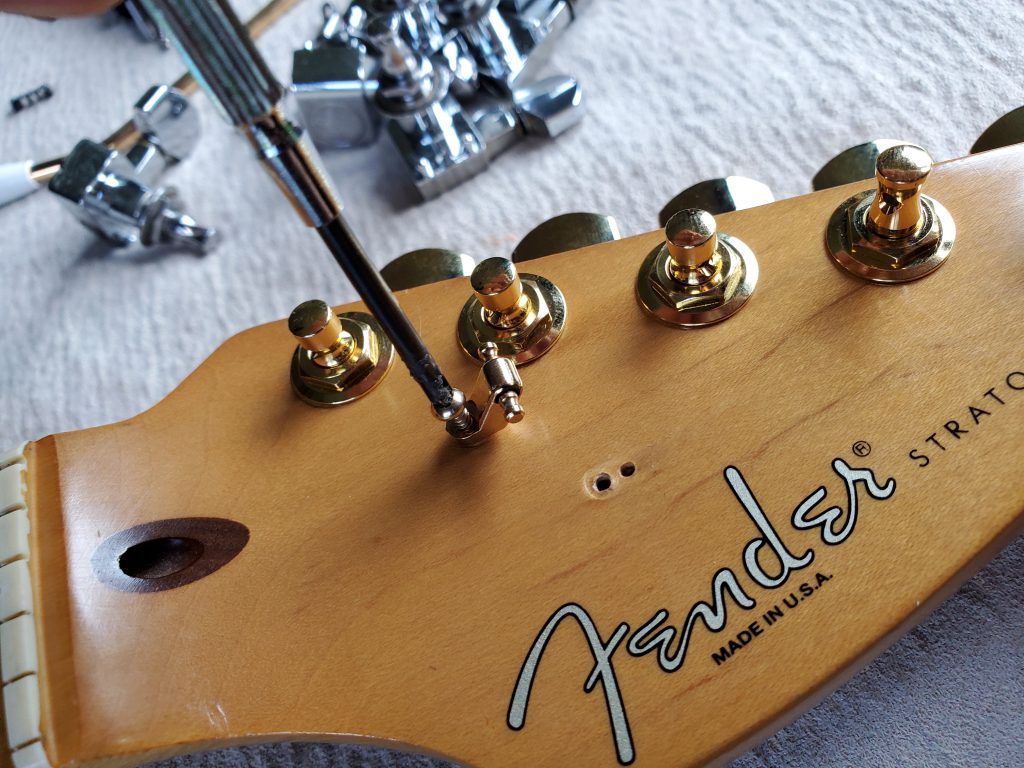
This time I thought it’s time to order from Fender, and since everything else was working well, it was time to replace all the chrome hardware with the gold version. The bridge, tuning keys and everything else that was chrome. so I placed down the order for all the hardware, and a few weeks later they arrived.
Time to make the finishing touches.

The tuning keys I ordered are also locking, so that was actually an upgrade.
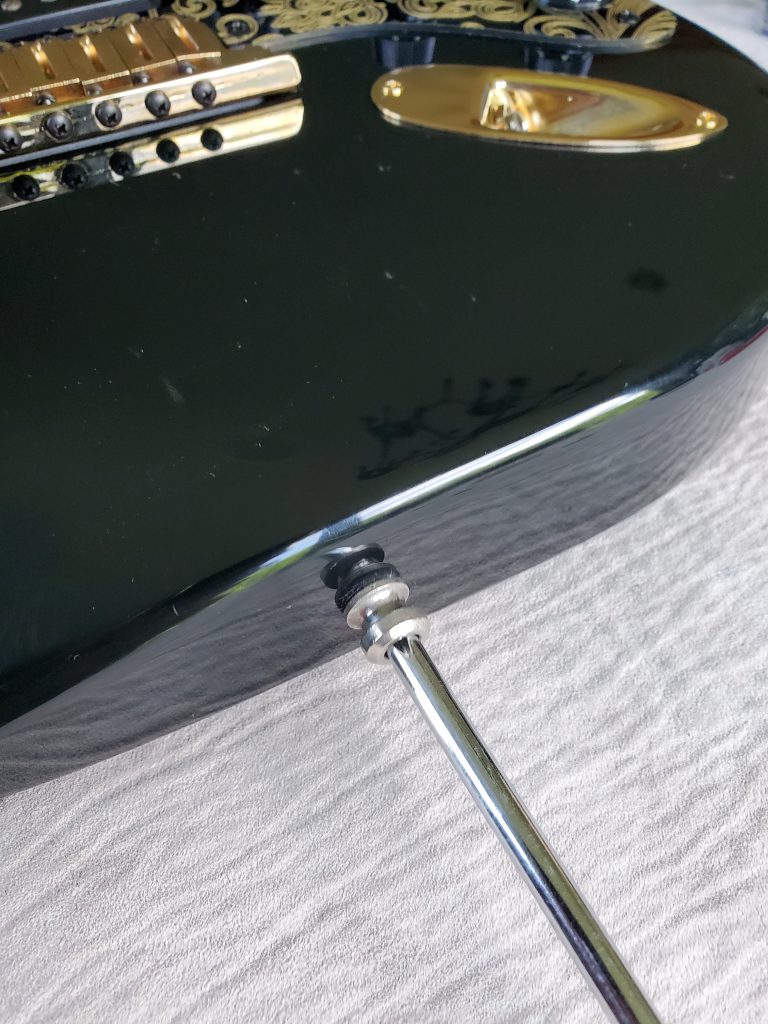
And the tremolo bridge arrived as a kit, it included a couple of trees and a set of springs and the spring plate. So now I have a spare set of springs.
All done! Time to install a new set of strings. Then do some fine tuning and intonation. Tightening or loosening the screws that attach the saddles at the back of the bridge will move the saddle pieces toward or away from the fretboard. If the fretted note on the 12th plays sharp, the screws should be tightened (turned clockwise). If the fretted note sounds flat, you turn the screw counter-clockwise. To check if it sounds sharp or flat, you can play the harmonic note right at the 12th and compare it to the fretted note.
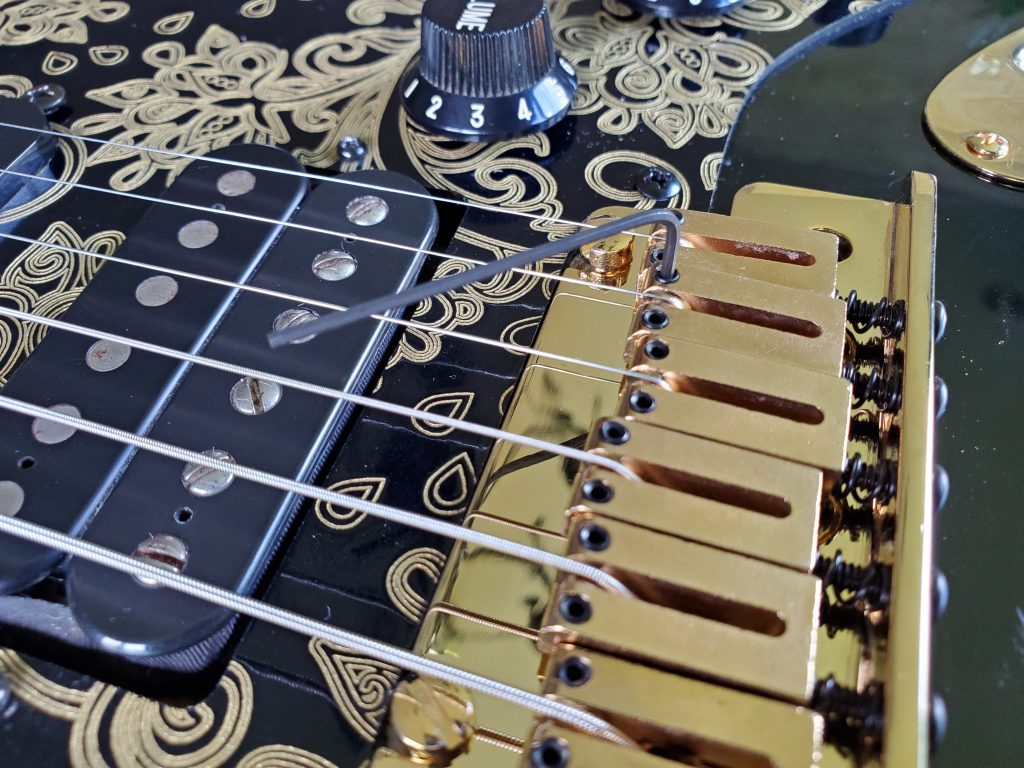
The tiny screws that are on top of the saddles adjust the string action, in other words the height of the string. It is important to note that any of these adjustments including the spring tension adjustment in the back of the guitar will affect string tuning, so every time you make a small move you will need to re-tune and test it again.
Well, this was a fun post to write. One of my longest post to date, if not the longest one yet.
Thank you for taking the time and reading through. And special thanks to my dear friend Amr Rifai from Amorite Guitars for his help and supervision throughout the entire process.
And now I let you enjoy this glorious view.
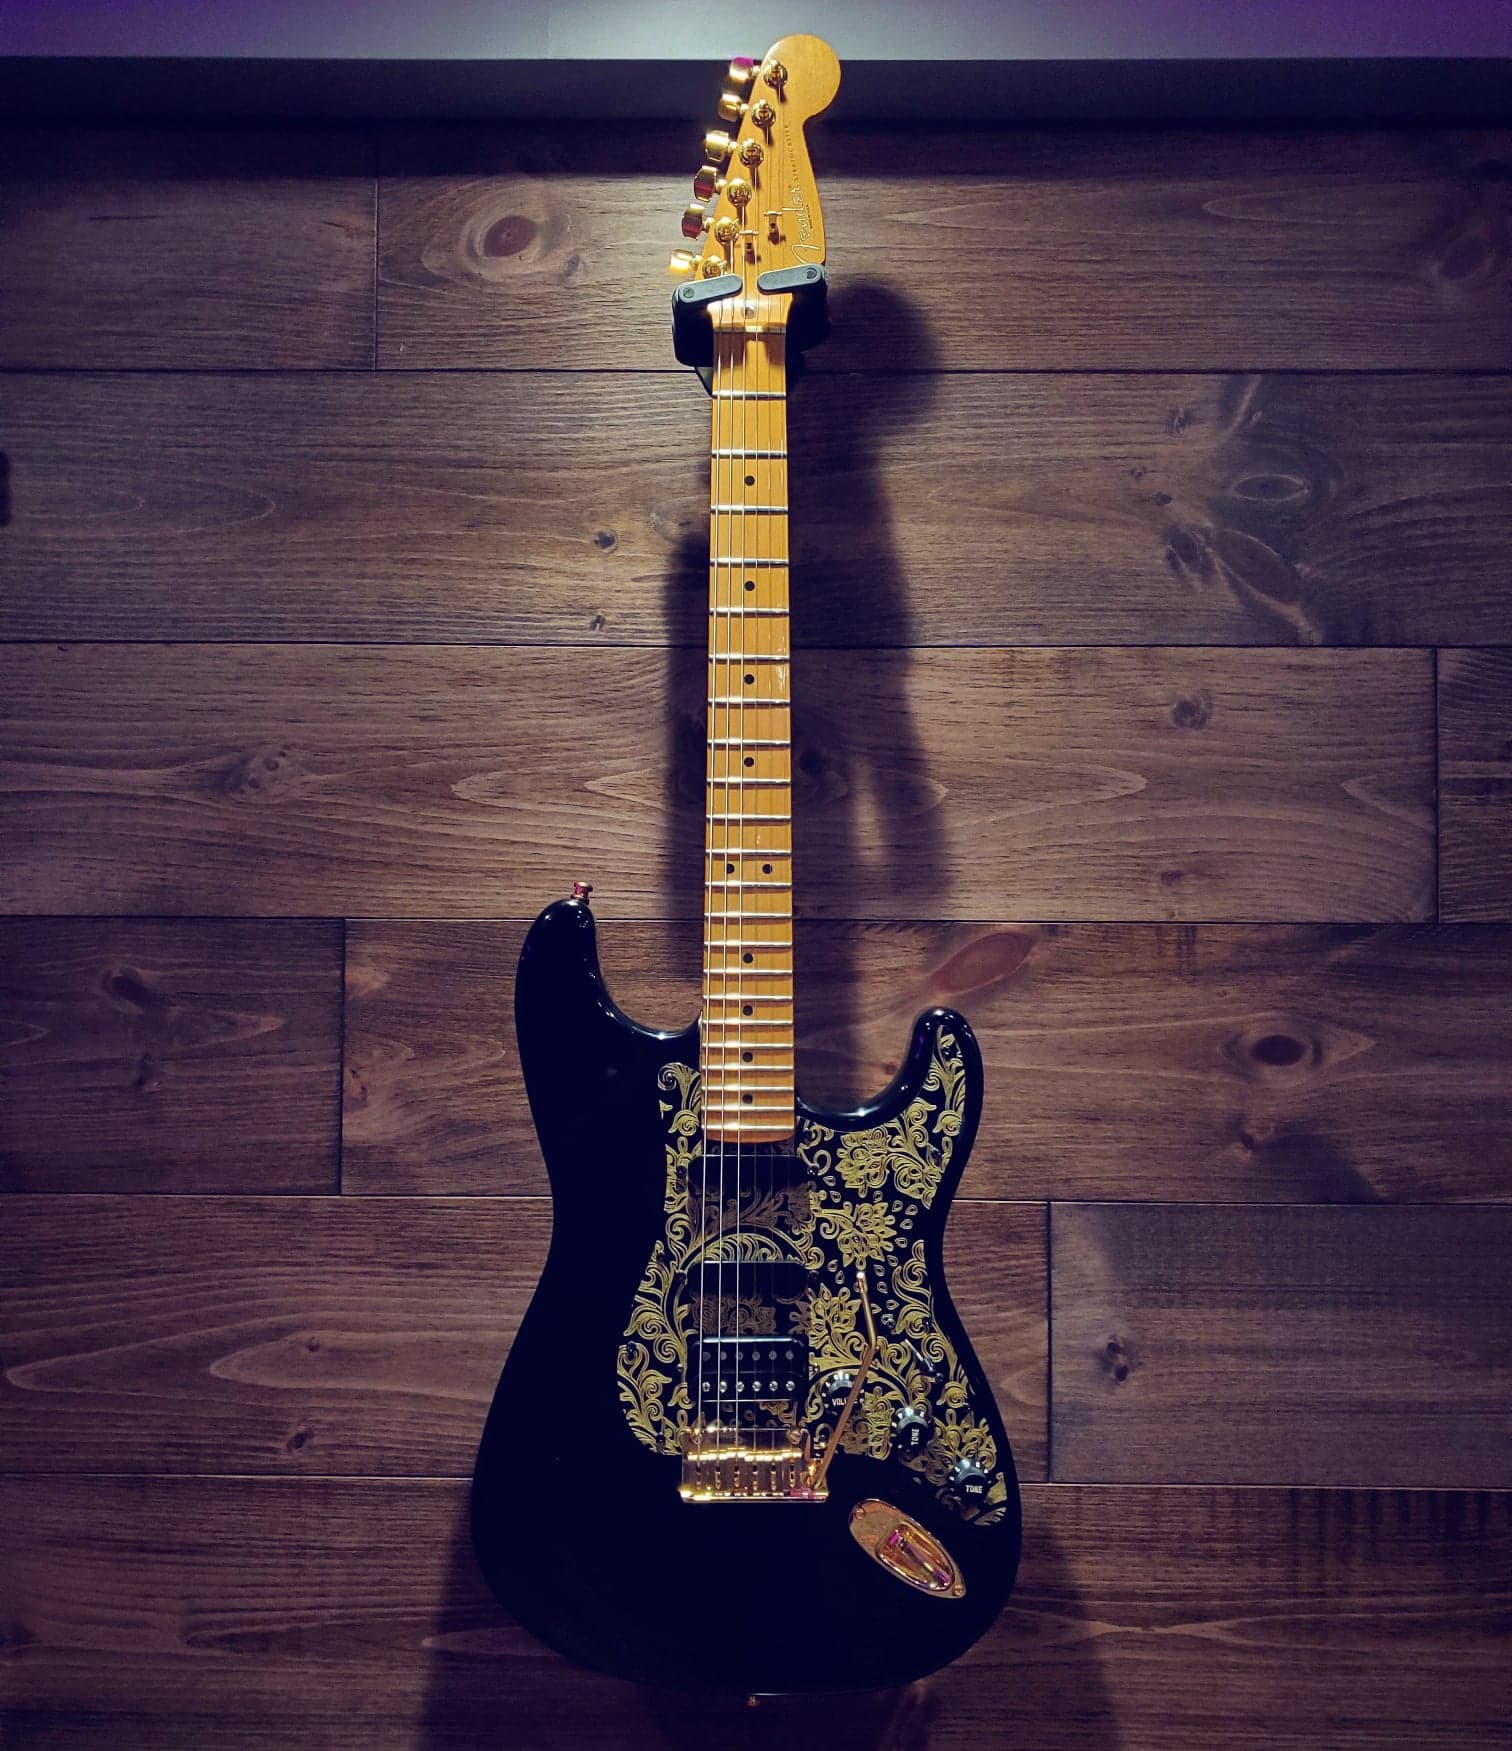
Cheers!
Shant